How do I set up an integration between Digital Commerce and Google Shopping?
Purpose and scope
The integration between Digital Commerce and Google shopping syncs your product catalogue with Google Merchant Center. Once synced, your store’s products can be included in Google’s free listings and promoted using Smart Shopping campaigns. Our built-in configuration tool guides you through creating a link between our software and Google Merchant Center, which allows you to use Google Shopping campaigns ads with direct links listed to products in WebShop.
The purpose of this feature guide is to explain in detail how to use our built-in configuration tool to integrate Aphix with Google Shopping.
This feature is only available as part of the Digital Marketing SmartPack. Contact our sales team for more information.
Key points
You need to follow this procedure once to set up an integration between Digital Commerce and Google Shopping.
You must have a multi-client account with an associated sub-account in Google Merchant Center.
This step by step guide is intended to help you highlight the key settings you need to set so that your Google Merchant Account is integrated successfully with Aphix. It does not provide detailed descriptions for every step needed to either create or use Google Merchant Center effectively. Read this Onboarding Gu ide - Sign up for Google Merchant Center1, which has been been written by Google and is shared on an external site. Note that Experlogix Digital Commerce has no control over its contents.
Introducing terms and concepts used in this article
Term | Definition |
|---|---|
API | (API), which is an interface that allows two different computer systems interact with each other. It consists of a number of rules (also known as endpoints) that request data from the other system and receive and process responses from that system. |
API key | a code used to identify and authenticate an application. |
Enterprise resource platform (ERP) | a collection of your critical business operating systems, such as product, stock levels, financial, customers, suppliers and so on that run on the same platform. |
Google Merchant Center | a service offered by Google which allows you to add your product information into Google. Once this information is uploaded to Google, the service makes it available to your customers when they search for your products using Google. |
Product feed | a structured description of your products that can be shared with other channels. |
Uniform resource locator (URL) | (URL), the address of a website. |
Step by step
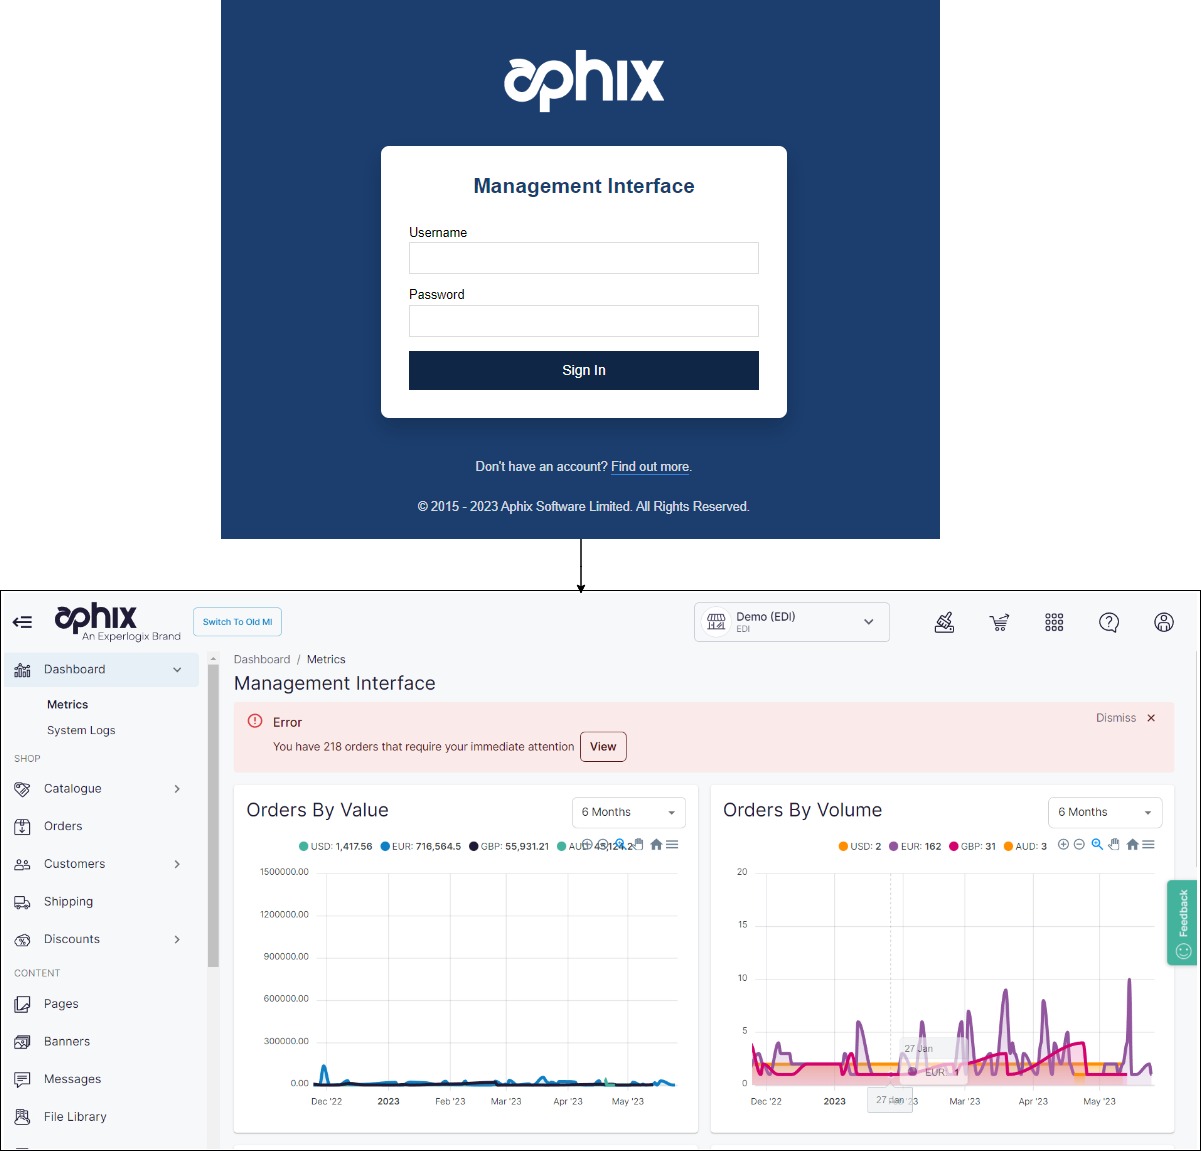
Log into Management Interface
Log into Management Interface using your username and password. This opens the dashboard of your Management Interface.
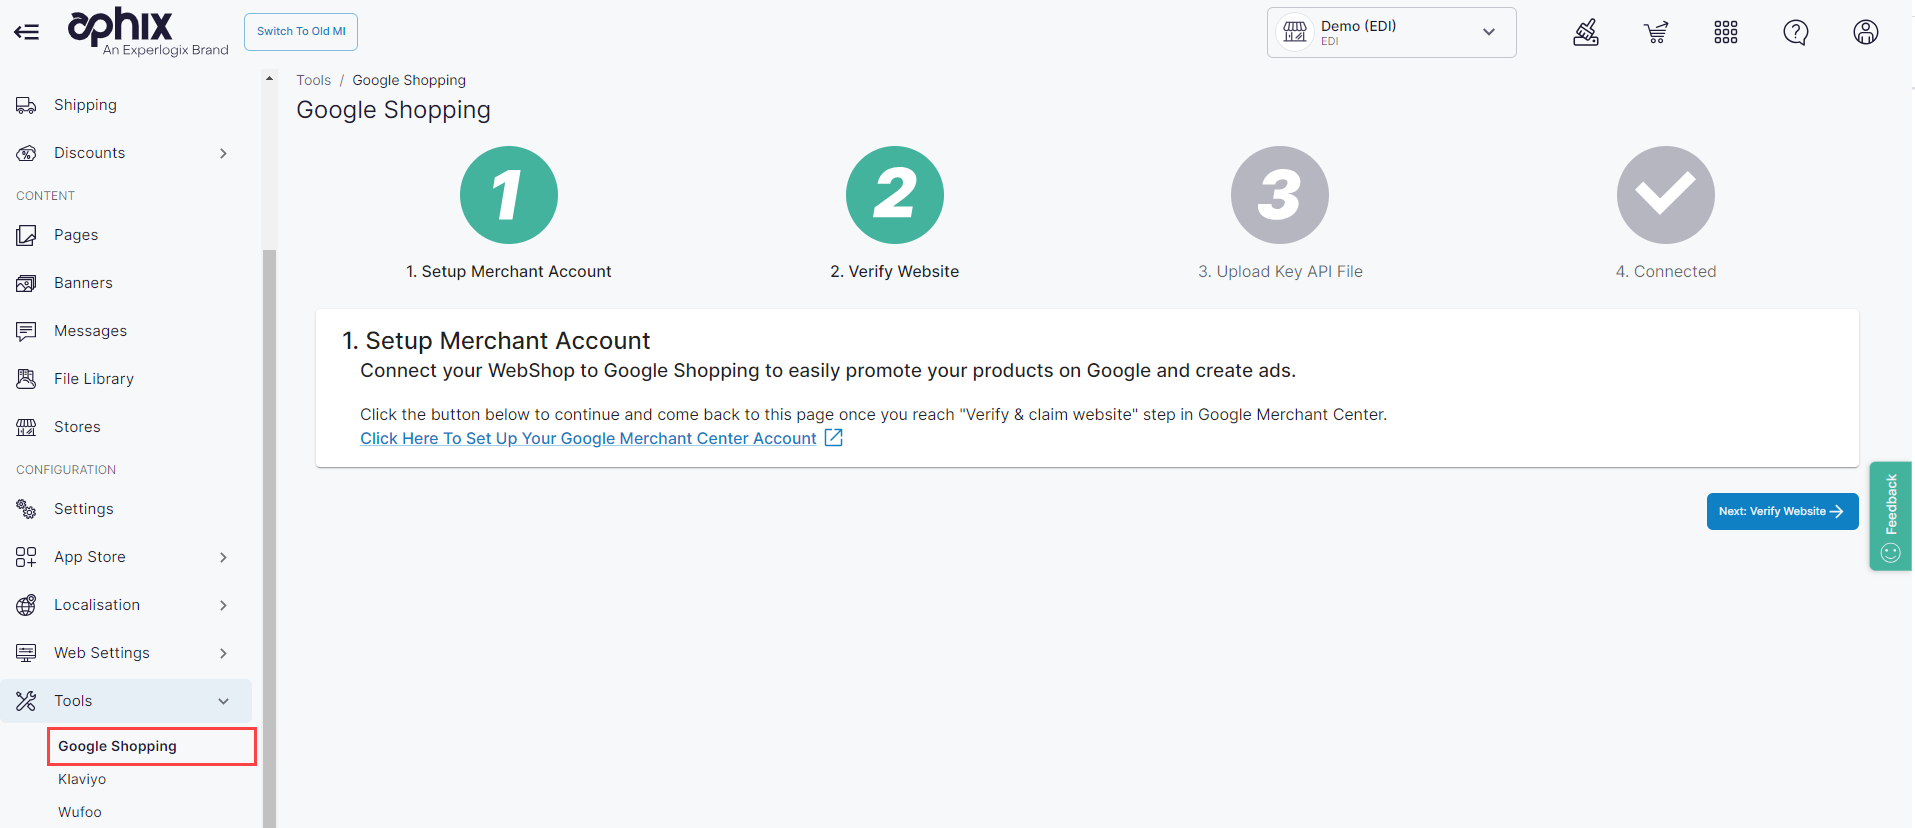
Open Tools
Click Tools under Configuration on the left side menu.
Select Google Shopping from the list of options. This opens the configuration tool that allows you to set up and configure the integration between Aphix and Google Merchant Center.
Key points
The configuration tool guides you through the 4-step process of integrating a Google merchant account and our platform:
Register with Google Merchant Center.
Link your Google merchant center with your WebShop.
Configure your product feed.
Finish configuring your Google merchant center account.
Note that all six steps must be completed to fully create a Google Merchant Center account.
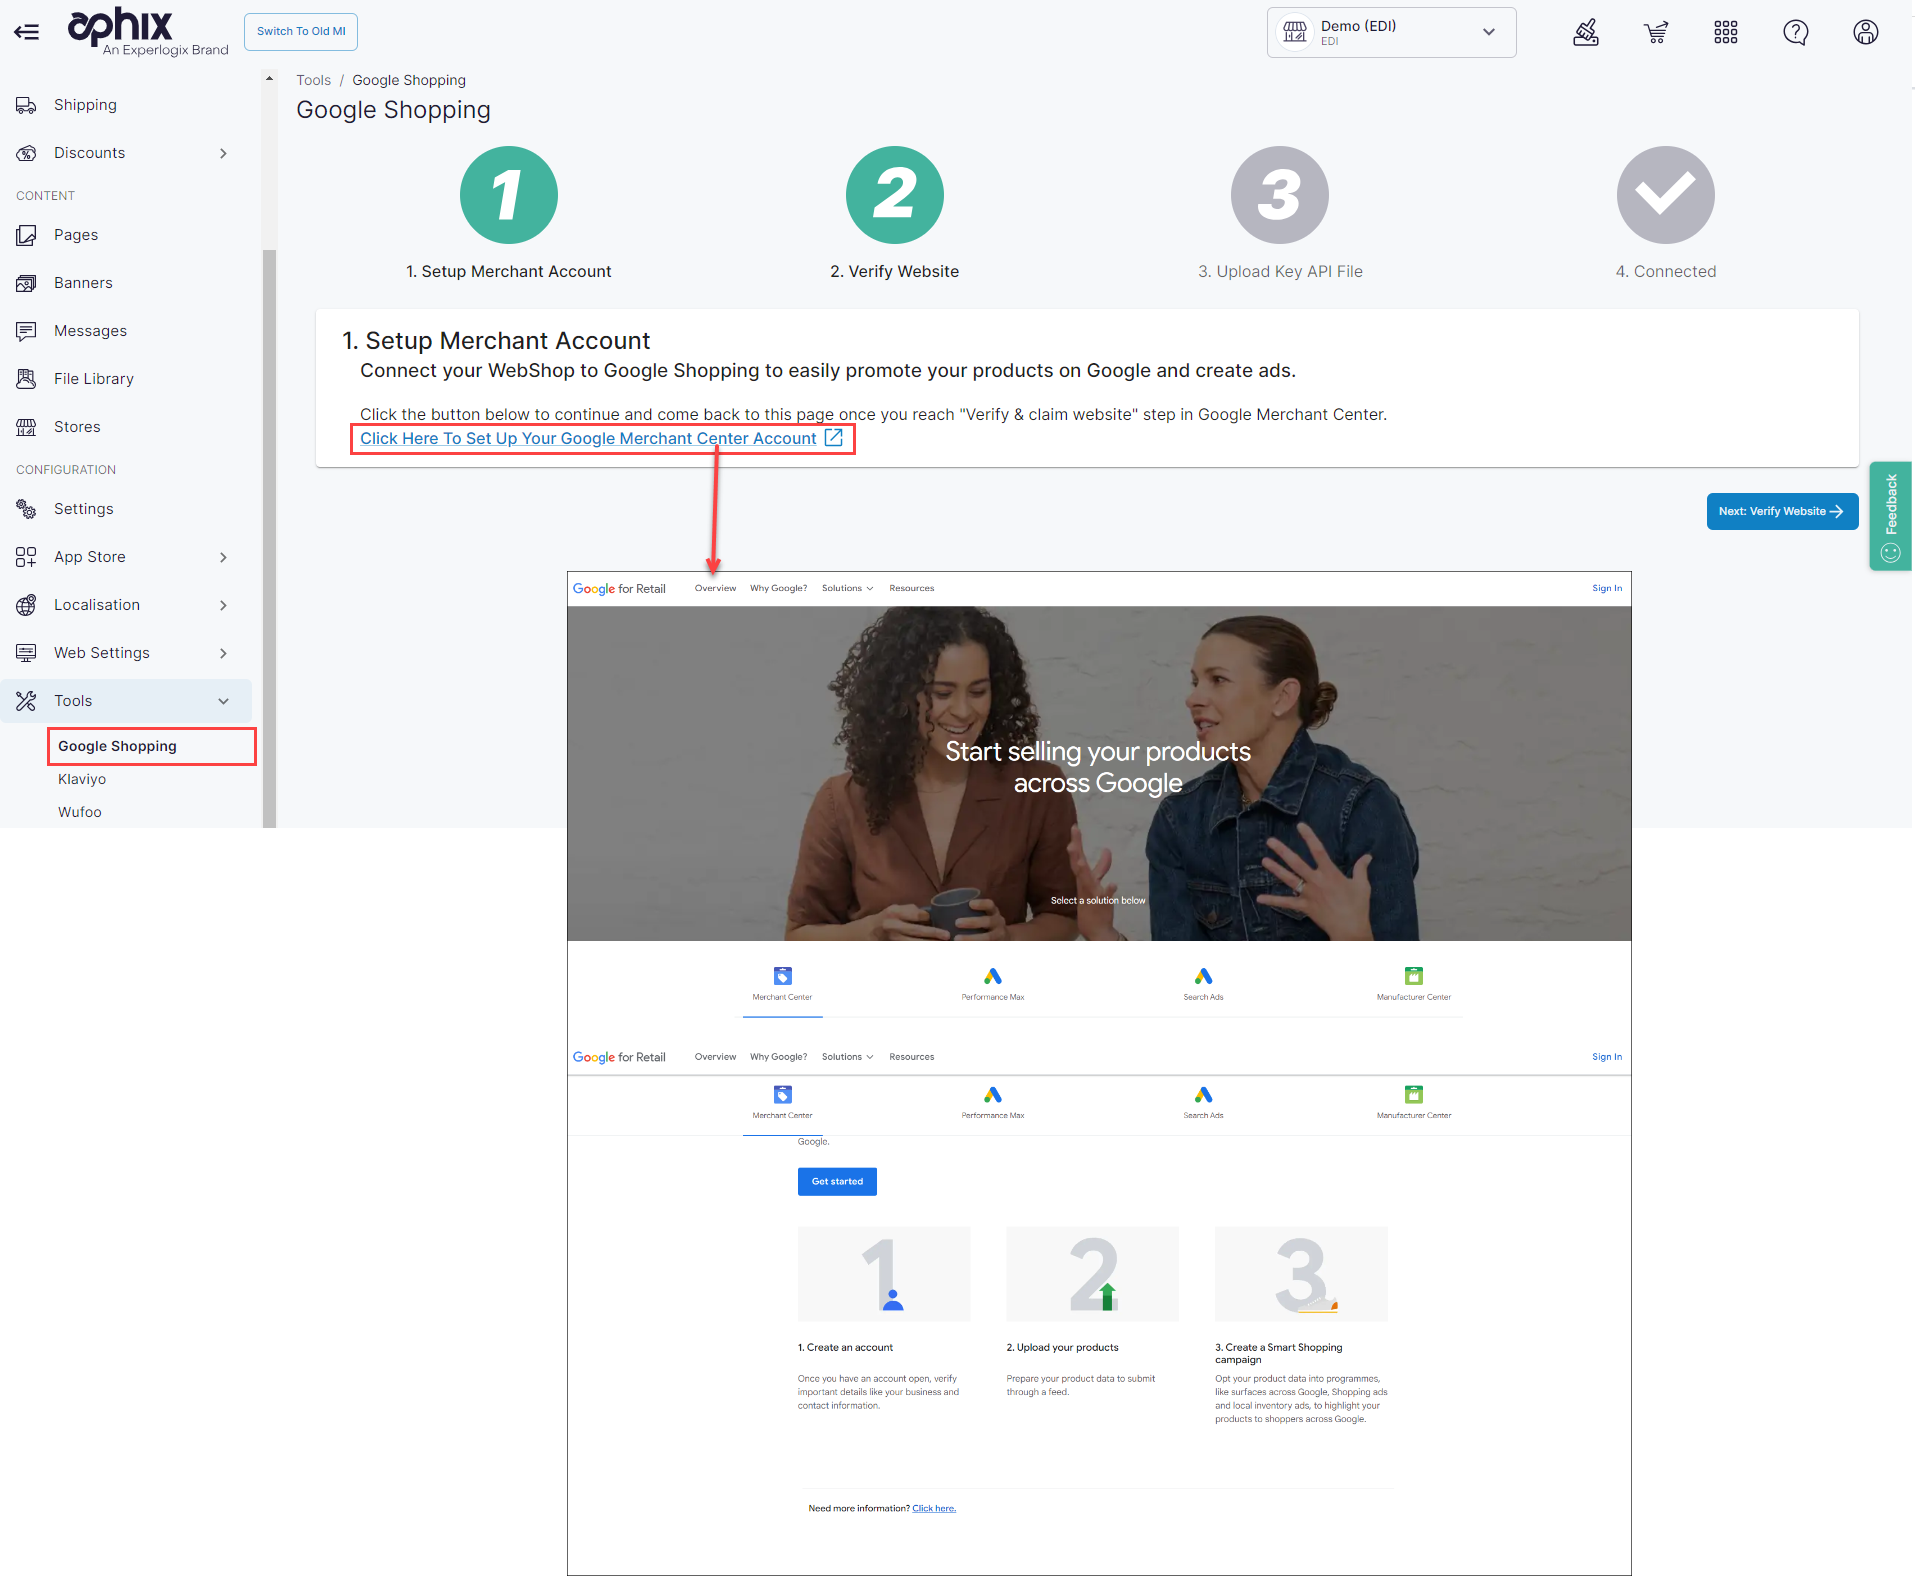
Register with Google Merchant Center
Click 
Remember that you must create or use an existing multi-client account with an associated sub-account.
Always select "On my Website" to ensure that the checkout process is always carried out on WebShop.
Create your Google Shopping account
Here are links to some additional help, which is shared on an external site. Experlogix Digital Commerce have no control over the content of these guides.
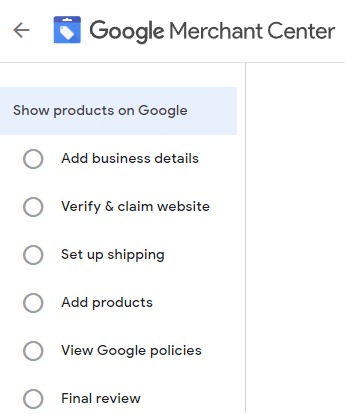
Follow the directions on the Google Merchant Center set up screen to
add business information
verify & claim website by entering the URL of your WebShop into the field labelled “Website address“ and selecting to “Add an HTML tag or upload an HTML file to your website“.
Next, take note of your merchant ID, (typically found in the top right of the Google Merchant Center set up screen) and the HTML tag (typically found at the bottom of the Google Merchant Center set up screen),
Return to Management Interface, click “Next: Verify Website →“. This opens Step 2 in the configuration tool.
Copy the merchant ID into the field labelled Merchant ID
Copy the HTML tag and paste it into the field labelled Google site verification HTML tag.
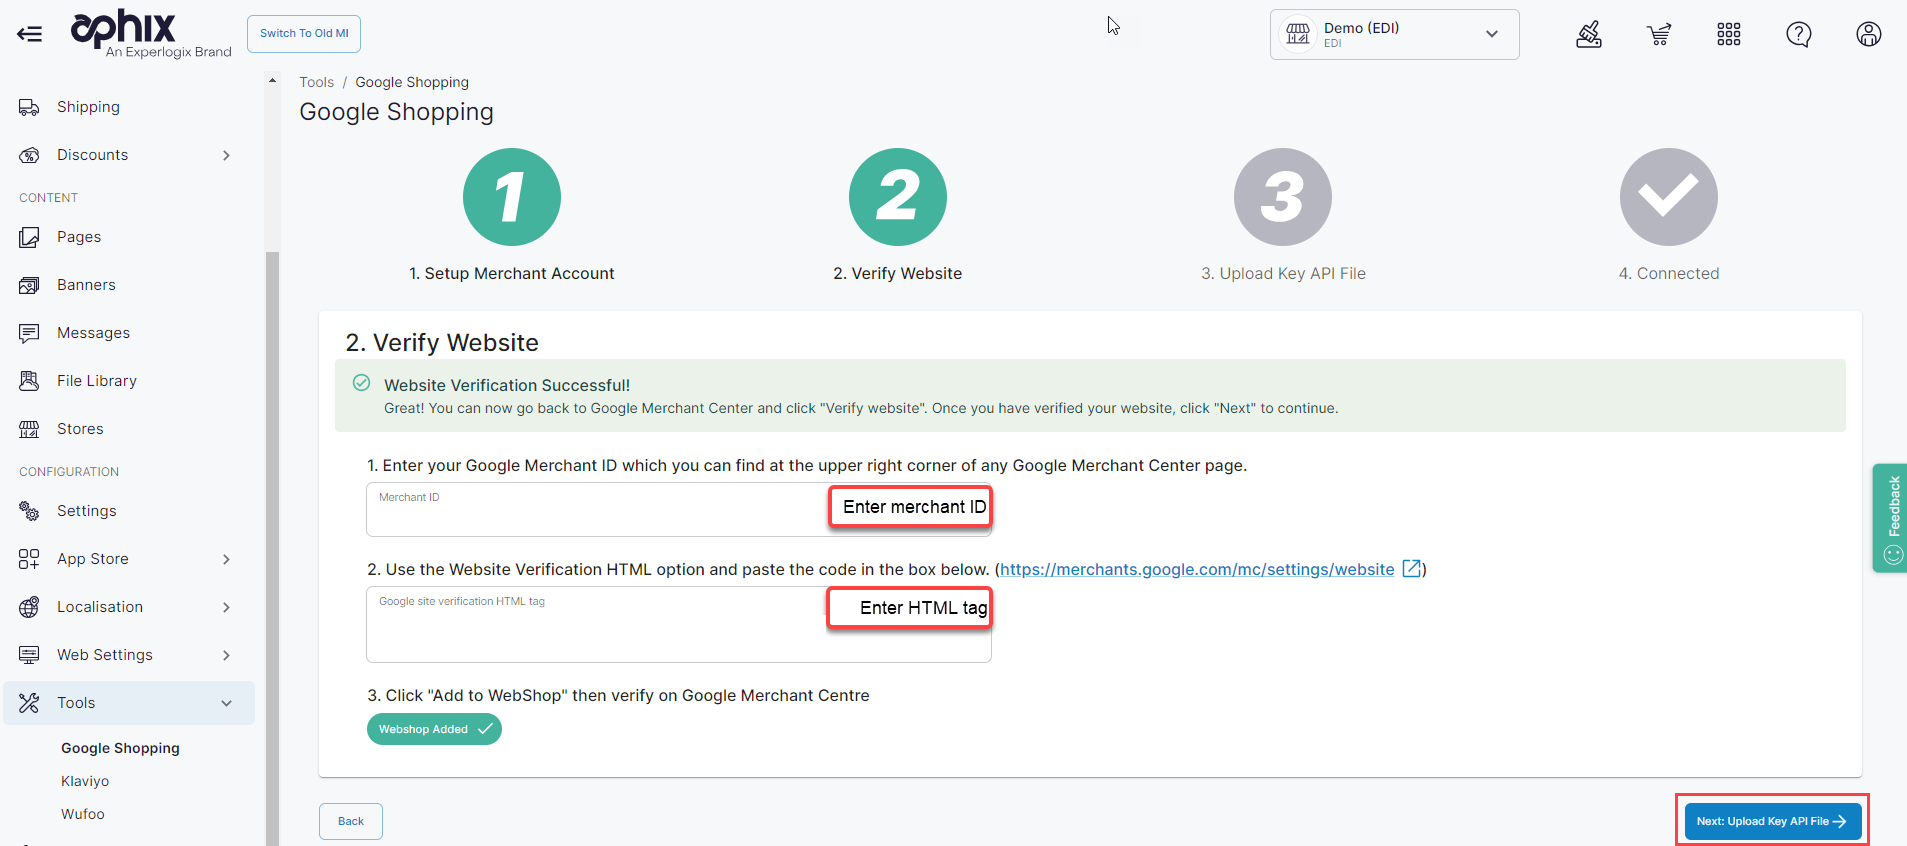
Click Save in Management Interface.
Return to the Google Merchant Center set up and click "Verify Website". This checks the website you've entered and verifies it.
An error message is returned if Google Merchant Center can not verify the website address you have entered. This may be because of one of the following reasons:
Your WebShop has not been switched on yet
You have entered incorrect data in the Merchant ID or Google site verification HTML tag fields.
Fix the error and try again.
Once the website has been successfully verified in Google Merchant Center, return to Management Interface and click “Next: Upload Key API File“. This moves you to Step 3 in the configuration tool.
Set up shipping
This is an optional step. We recommend that you do not complete it, since if done incorrectly, the Google Shopping feed will not work correctly.
Configure shipping in Google Merchant Center.
Configure product feed
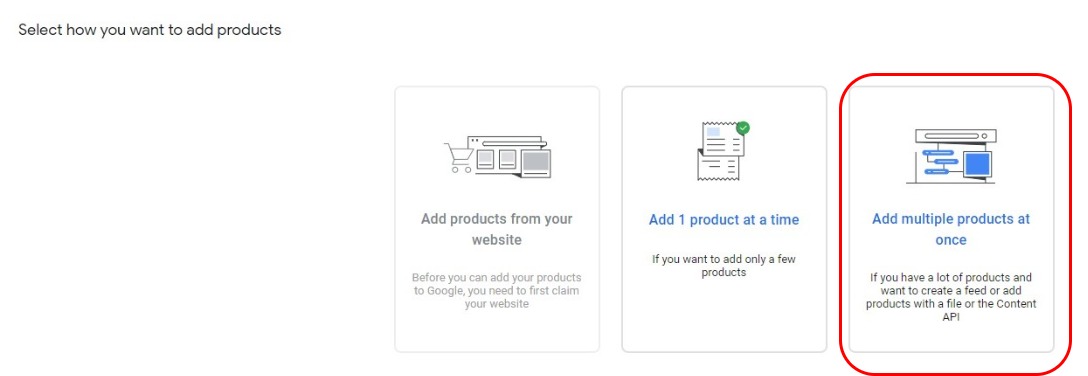
Add products
To create a product feed, select Add multiple products at once option.
You are presented with a set of three screens to complete product feed creation:

Enter basic information.
Define the product feed name and input method.
Set the product feed name to the name of your Aphix WebShop.
Select Content API. This allows you to set up an automatic product feed from your ERP via WebShop to your Google Merchant Center account, allowing you to quickly and easily avail of Google Shopping ads.
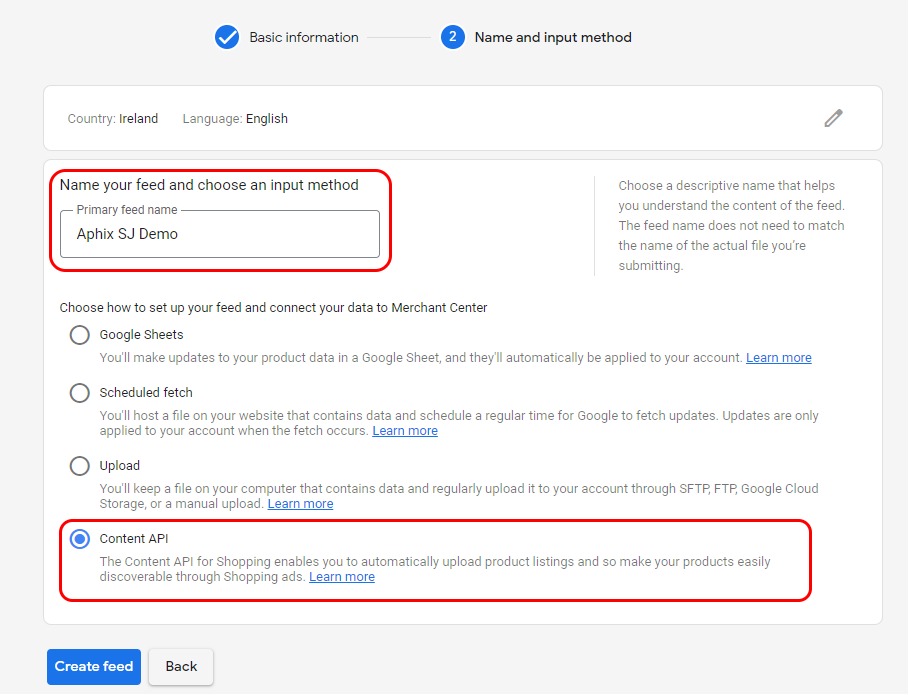
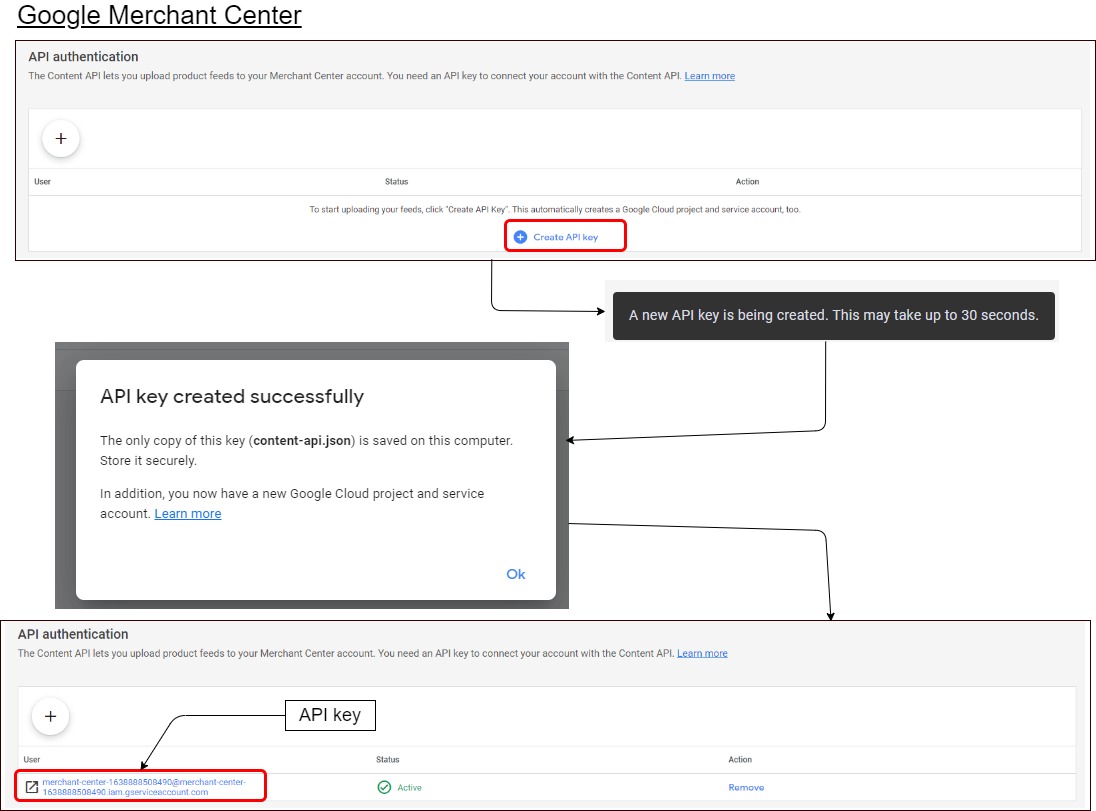
Click Create feed. This opens a screen inviting you to create an API key. An API key is an unique code used to authenticate a system or user, and allows secure interaction between your account in Google Merchant Center and your Aphix WebShop.
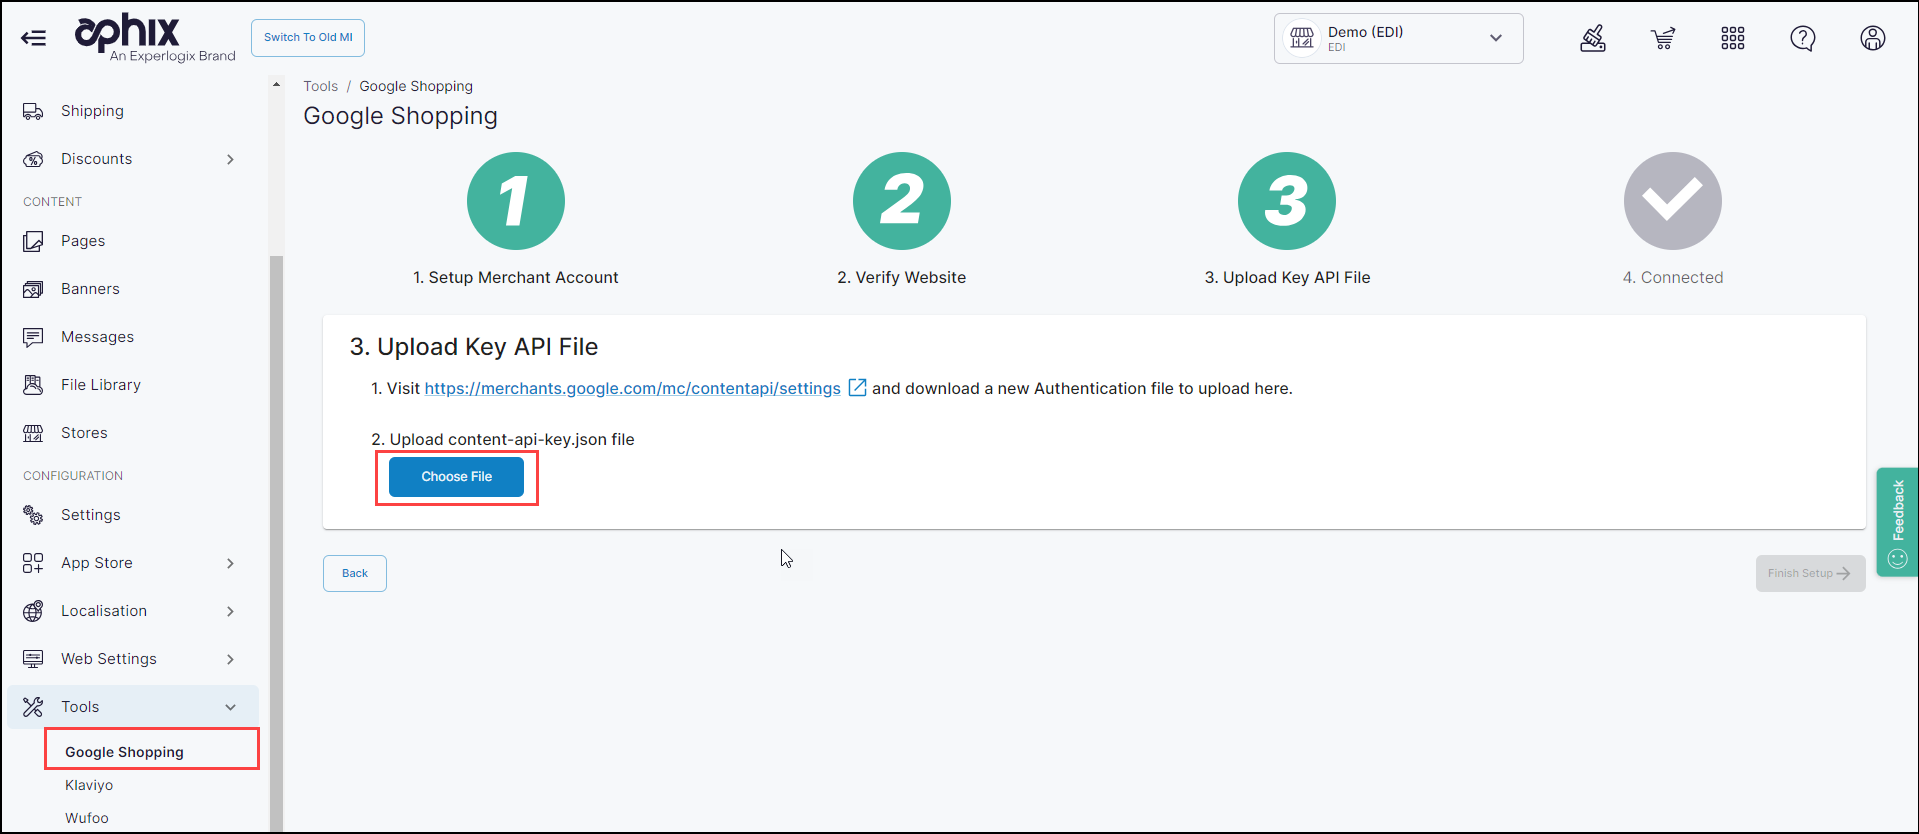
Click Create API key. The process to create an API key is initiated, and may take up to 30 seconds. The API key is automatically added to your Google Merchant Account and you are required to download it and store it on your computer. Typically, it is a file ending in .json.
Return to Management Interface.
Click Choose File and select the API key from where you have saved it on your computer.
Click Upload. This saves the API key.
An error occurs if Google Merchant Center can not verify the connection. If this happens, you have to return to Step 1 and carry out the steps again.
Read Why is the connection between WebShop and Google Shopping merchant account not established? for some advice on how to troubleshoot errors.
Complete configuring your Google Shopping account
References
1 External site: Onboarding Guide - Sign up for Google Merchant Center
2 External site: (Google Merchant Center) Advanced Account Setup
3 External site: (Shopping Automation) Create sub-accounts for merchants - Google Ads Help