How do I attach files to product pages?
Purpose and scope
Do you have products that have documents that you want to include as part of their detailed information? If so, attaching files to product pages is one way of achieving that goal.
This article provides a step by step guide on how to
set up your directory structure so you can easily add files to specific products
add files to the product, and display them in WebShop
Key points
We recommend that you read Managing files in Management Interface to get an overview of how documents are stored on our platform and Understanding product administration in WebShopShared Product Downloadsfor more background information before following the steps outlined in this guide.
Step by step
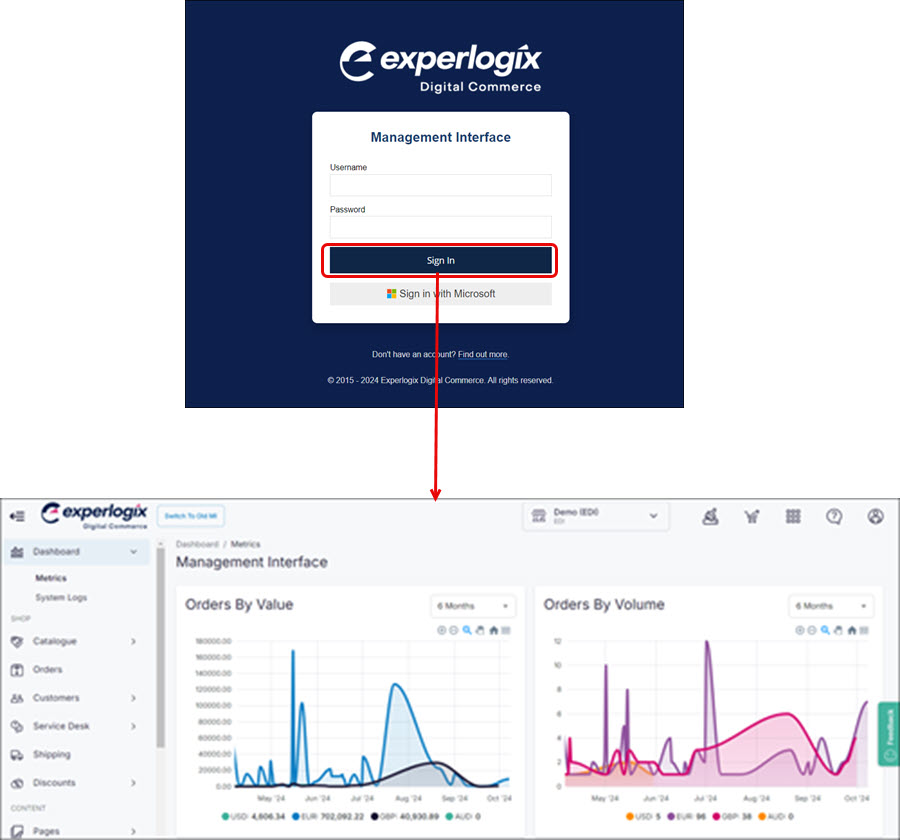
Step 1: Log into Management Interface
Log into Management Interface using your username and password. This opens the dashboard of your Management Interface.
Step 2: Set up your directory structure
Open File Library.
If it haven’t already been created, create ExtraDocs folder under Public files.
Add new folders for each set of associated documents.
Upload documents into the relevant folder.
The directory structure is used when creating the spreadsheet.
Example
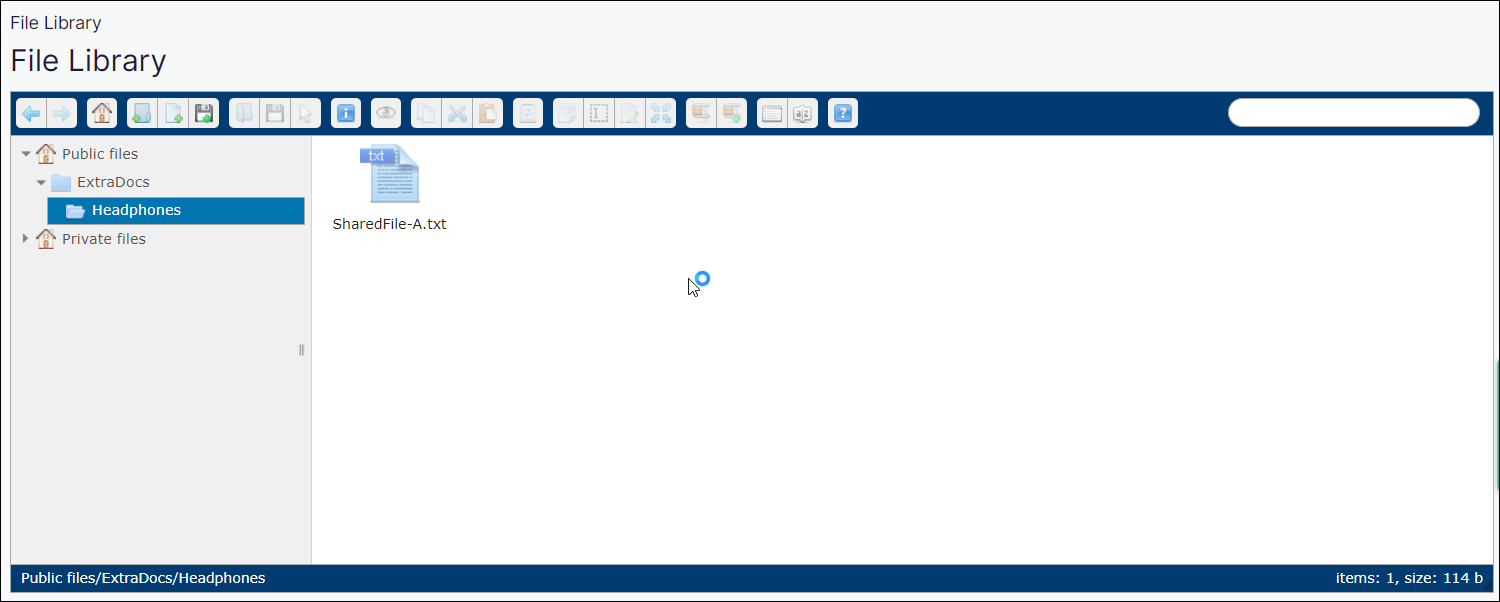
Suppose you have a document you wish to make available for download with all headphone products you list in WebShop.
In File Library, under Public files | ExtraDocs, create a folder called Headphones, and upload the file (SharedFile-A.txt) to it, as shown.
Step 3: Import shared product documents
Use our product import / export spreadsheet feature to quickly import shared product documents.
Either manually create a spreadsheet with the information you wish to import. The spreadsheet contains three columns as follows:
Product code (SKU) - the product identifiers who you wish to share the related documents with
DocFolder - the name of the folder where the shared document is found in File Library
DocGroupTitle - the heading displayed on the Downloads tab in the detailed product screen in WebShop
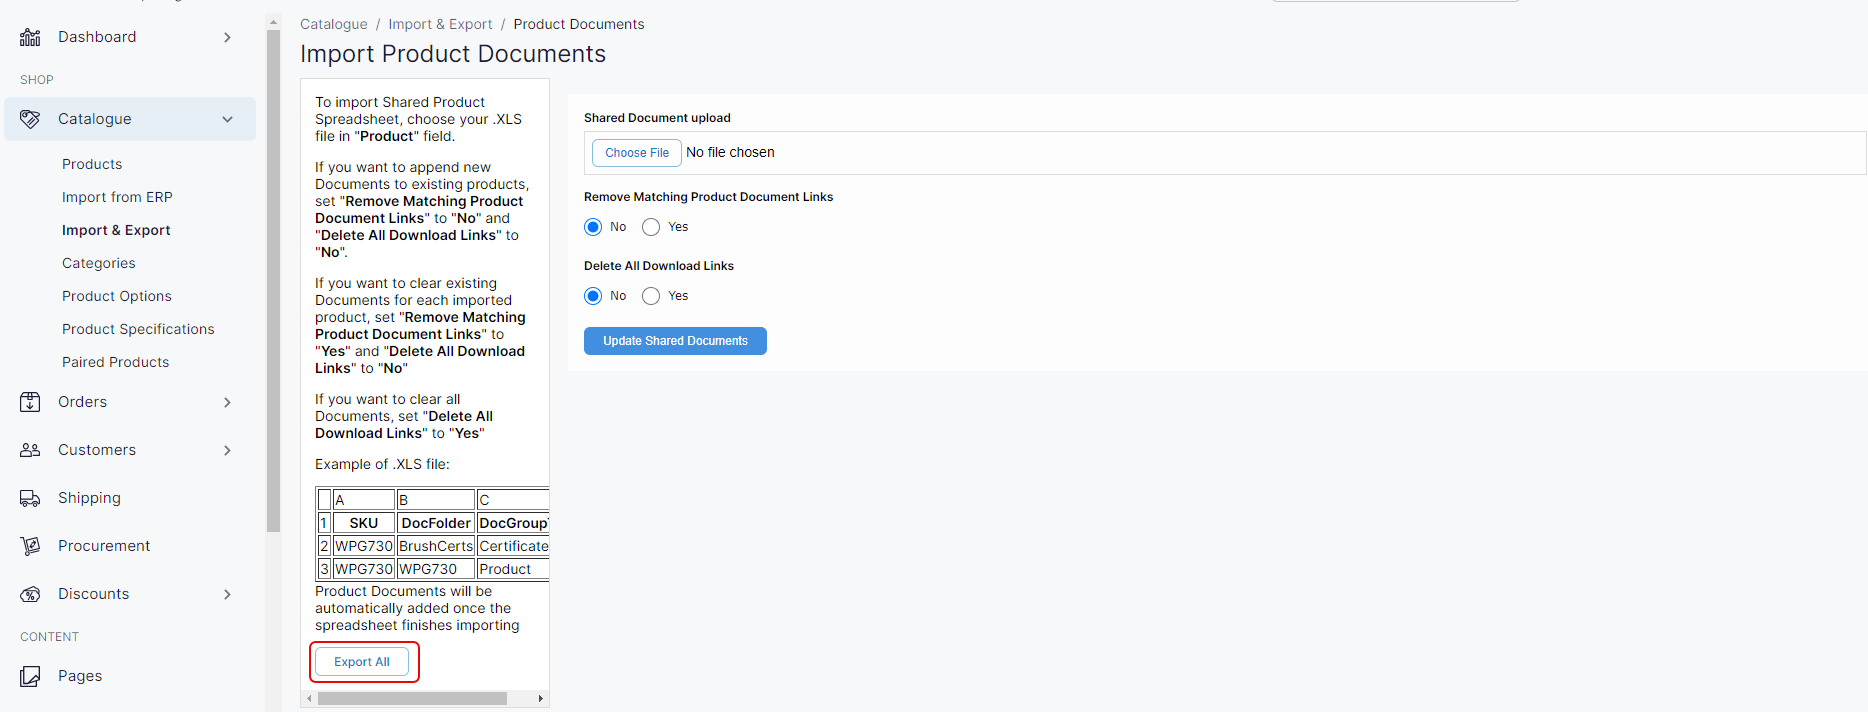
Or export a spreadsheet of existing data using “Export All” on the Shared Documents screen, and update it as required.
More information To export a spreadsheet of existing shared document data,
 Example continued You want to make the file (“SharedFile-A.txt”) available to two Headphones products with product codes (SKU): BEYP100WS and BEYPNY50WS. As previously shown, the file is stored in a folder called Headphones. The spreadsheet (saved as “Aphix-All-Shared-Documents-2024-01-15.xls”) contains the following data:  |
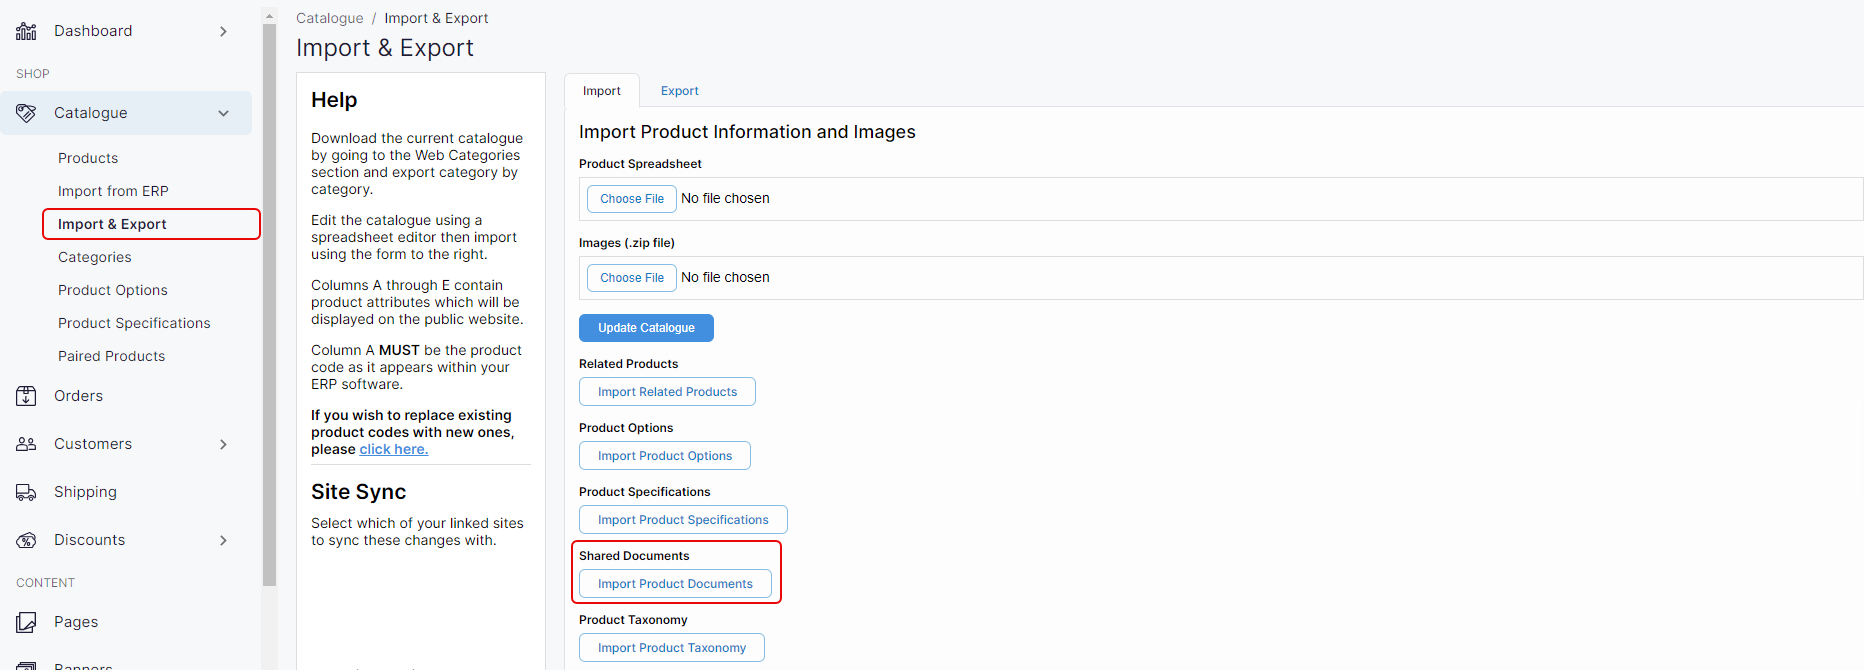
When the spreadsheet is ready for import, return to the Import & Export screen in Management Interface.
Select Import Product Documents, found under Shared Documents in the main content area. This opens the Import Product Documents screen.
Click Choose File and select the spreadsheet from your file directory.
Toggle the available options to specify the relationship between products and product documents.
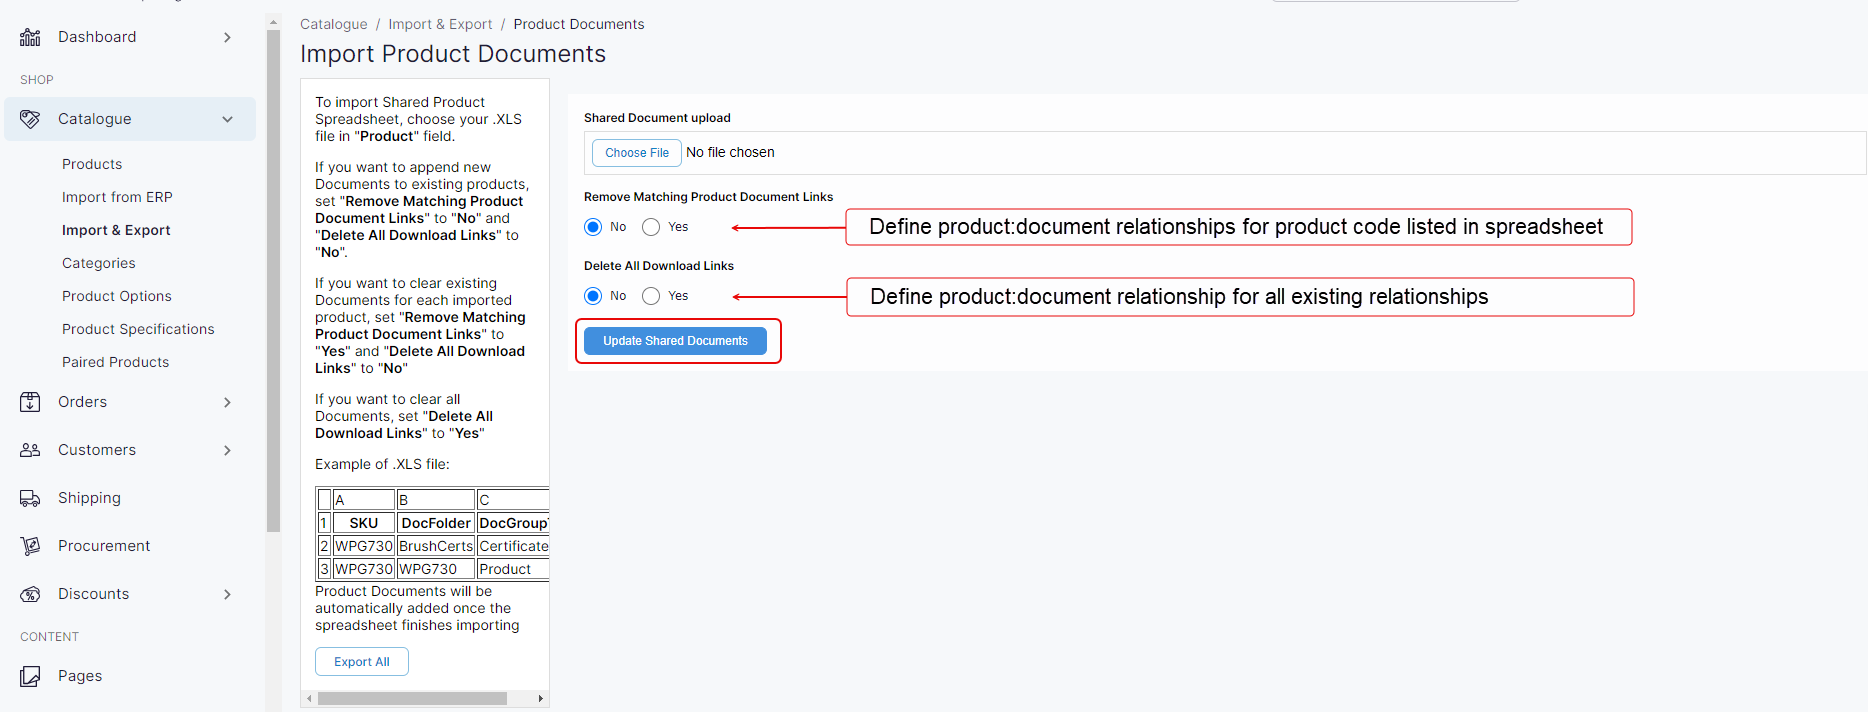
Option | Click ‘Yes’ to | Click ‘No’ to |
|---|---|---|
Remove Matching Product Document Links | Remove existing relationships between products and product documents for all product codes (SKUs) listed in the updated spreadsheet. | Append new relationships for all product codes (SKUs) in the updated spreadsheet to existing product:document relationships. |
Delete All Download Links | Remove existing relationships between products and product documents. | Append new relationships to the existing list of product:document relationships. |
Click Update Shared Documents. This creates the relationships between the product code and the documents as specified in the spreadsheet, adds the Downloads tab in the detailed product screen and lists all documents contained in the specified folder under the tile you’ve provided.
Remember that changes are immediately visible in WebShop.
Example continued
To upload the spreadsheet created in the previous step, click Choose file and select “Aphix-All-Shared-Documents-2024-01-15.xls” from your file directory. Click Upload Shared Documents. This imports your new product:document relationships.
Verify import
Your customers can see available documents to download once you have imported your changes.
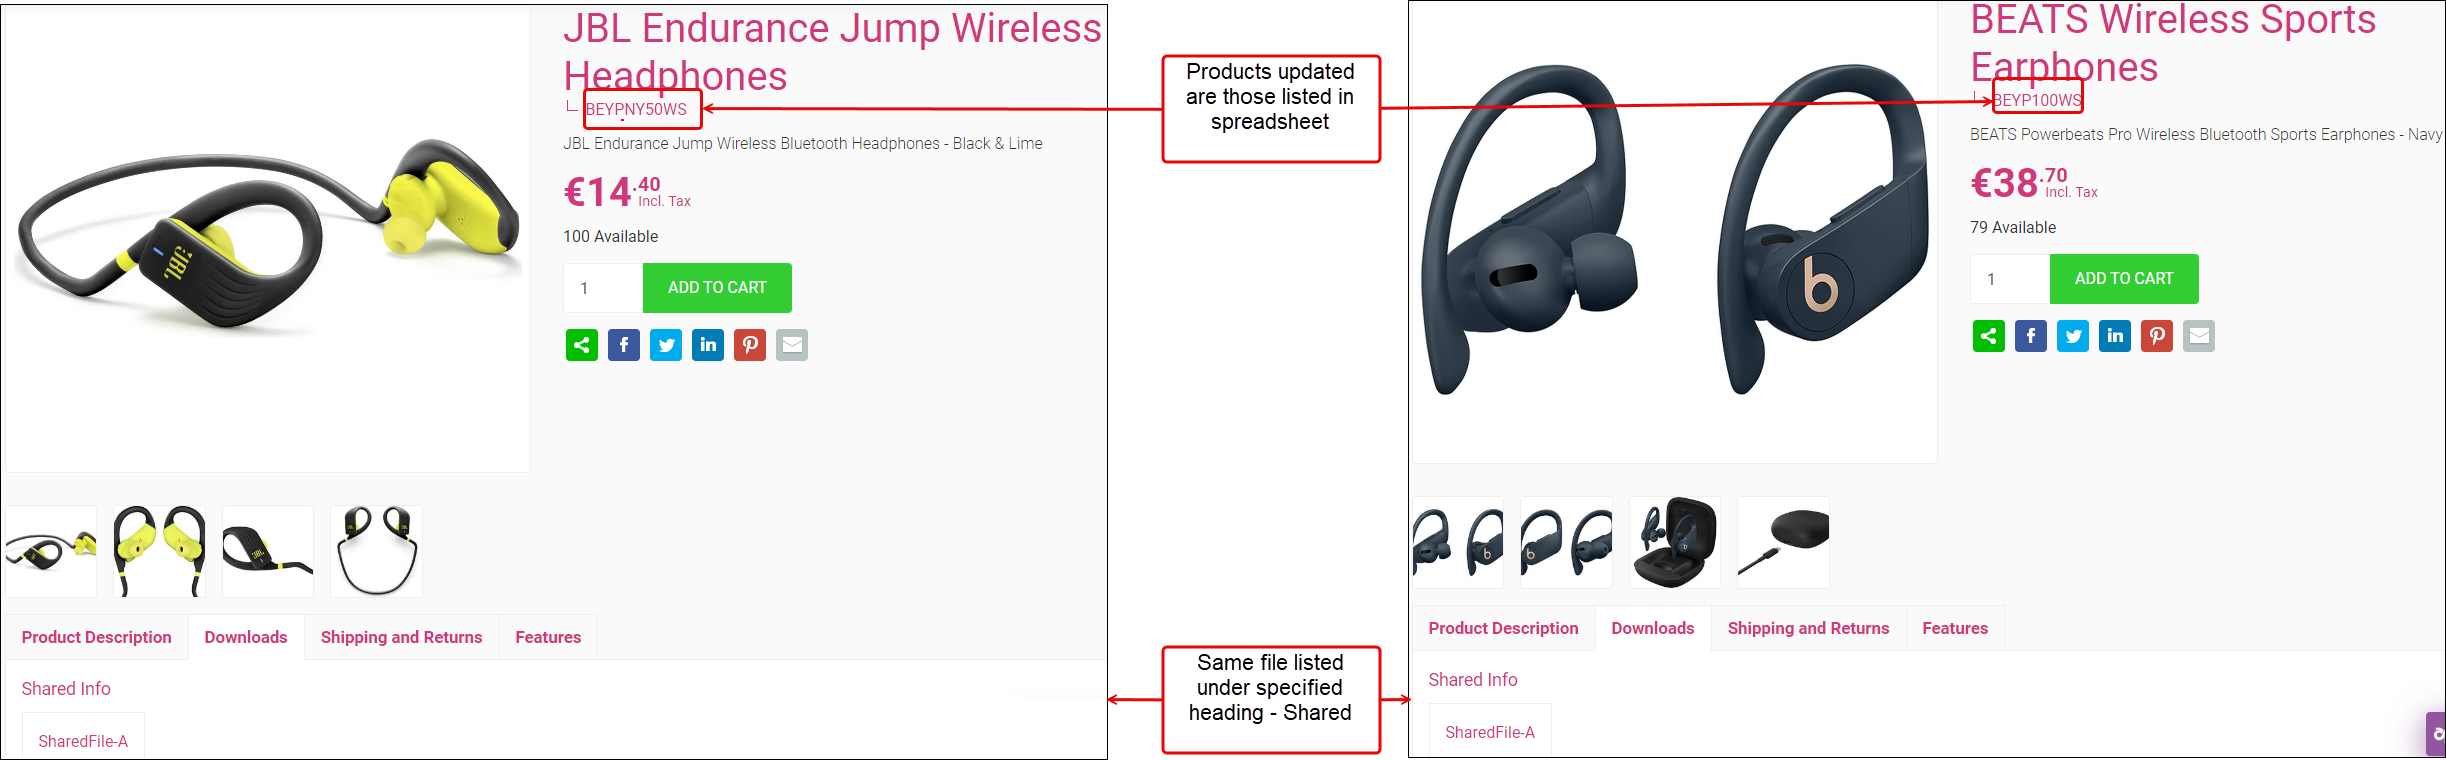
To verify that the relationships created between product and document are correct, view the detailed product screen of the product(s) in WebShop and check that the same document is listed under both products.
Example continued
The two products - with product codes BEYP100WS and BEYPNY50WS - have been updated with the new documents. One document is stored on our platform, but it has been successfully linked to two products, as shown: