Using Account Dashboard icons
Find out how to give your Account Dashboard menu items a new order or icons.
Purpose and scope
Do you want to update the look and feel of your customer’s “My Account” side menu with icons that match your brand? Or perhaps you want to change the order in which the options on the left hand menu are displayed?
Our Account Dashboard icon feature allows you to do just that! It comes with a set of default account dashboard icons that you can apply to different menu options. Alternatively, you can upload custom icons to use on menu items listed “My Account” in WebShop.
This article describes this feature and how to enable, configure and use it.
More information
Assumption
You are logged into Management Interface.
Set up
Key points
The Advanced Dashboard Icons feature only works on our most recent template, Forta One. If you attempt to enable this feature and are not using Forta One, a message is displayed inviting you to contact our support team for more information. Find out more about WebShop template and themes.
There are currently two features that are used for dashboard icons - this feature and another called Icon Packs. Only one of these features can be used at any time in WebShop. If you attempt to enable both features at the same time, both features are disabled and an error message is displayed informing you of the conflicts
Read our feature guide on Managing files in Management Interface for more information on how to use File Library.
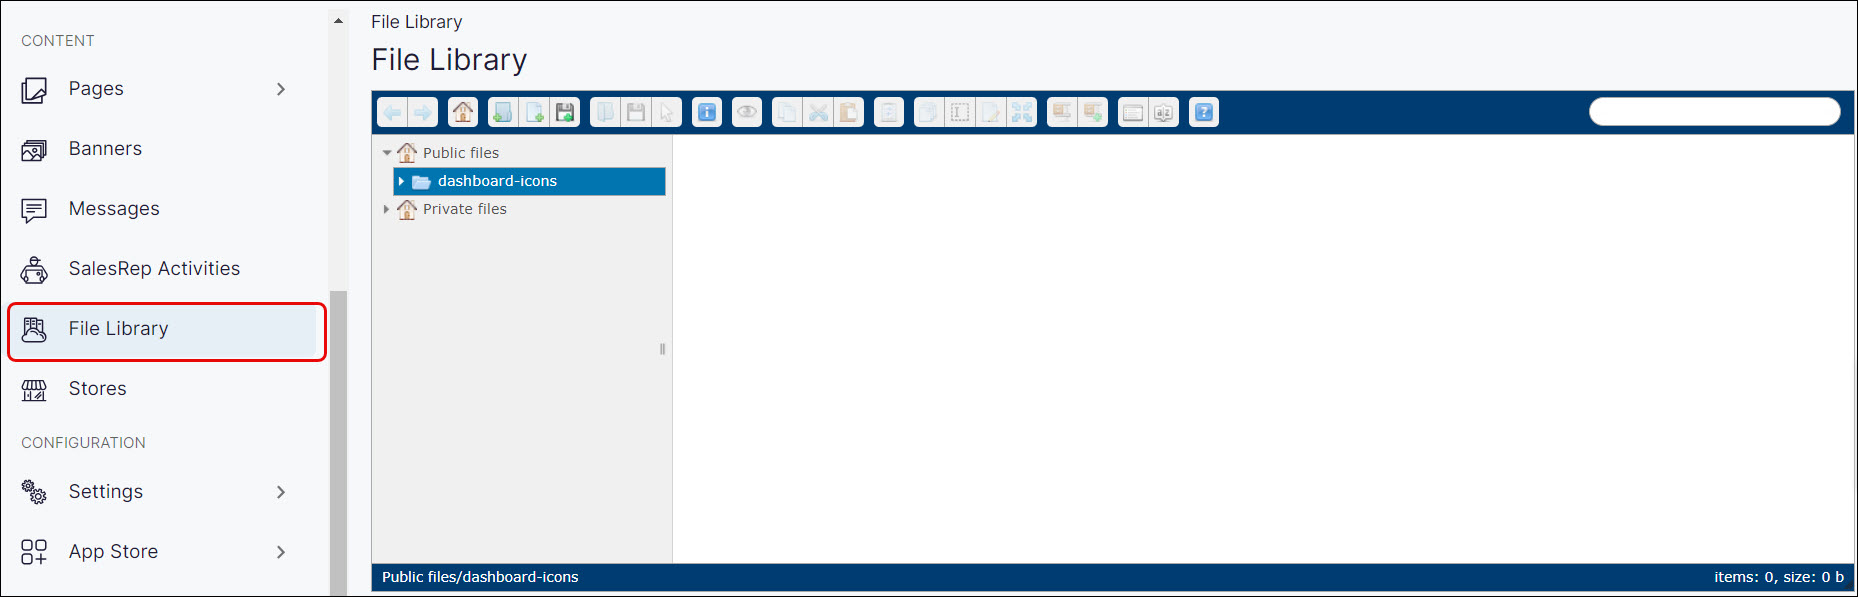
The default directory for dashboard icons is Public Files → dashboard-icons.
We recommend that each image is 250 x 250 px.
We support the following image file types: png, jpg, jpeg, svg and bmp.
Click File Library.
Navigate to Public Files → dashboard-icons.
Create the folder “dashboard-icons” if it does not exist. You will only have to create this folder once.
Right-click and select Upload Files from the displayed menu.
Select the image file(s) from your file directory and click “Select files to upload“. This uploads your image files to the correct location on our platform.
Once these two steps are complete, you can use the icon on your dashboard left side menu.
A default icon is used if you do not upload custom icons to the dashboard-icons folder in your File Library.
Edit a menu item
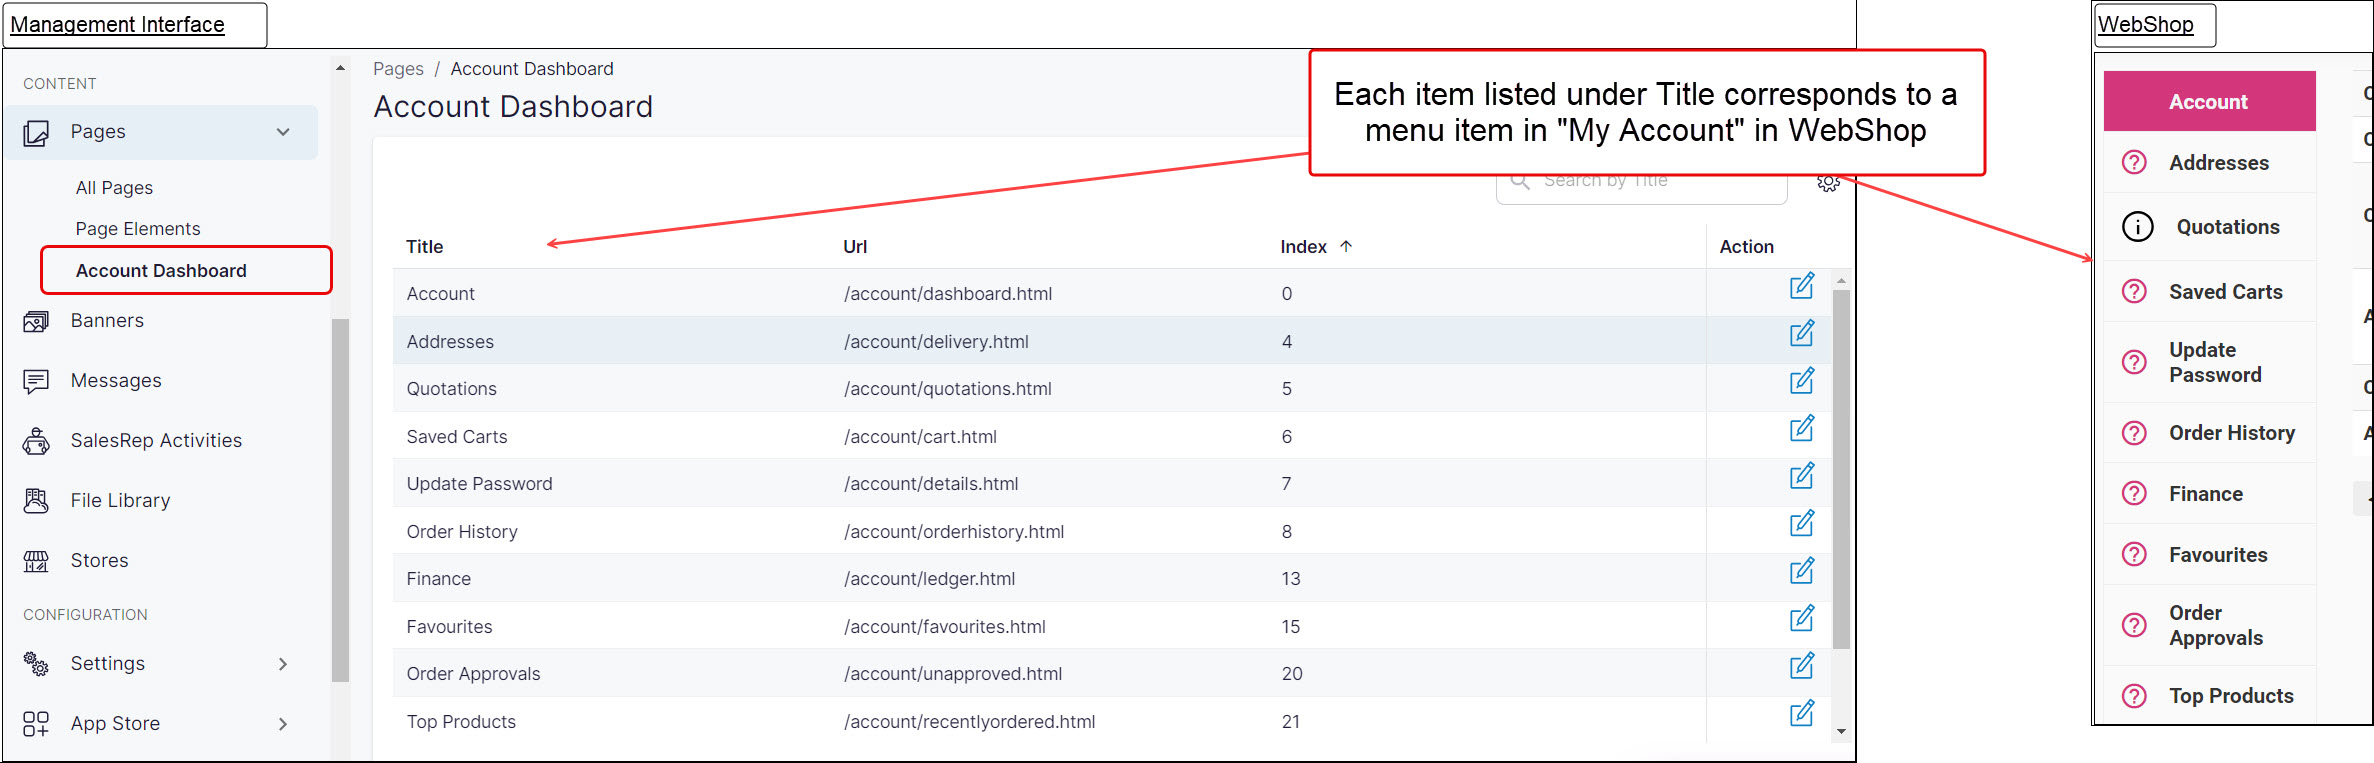
Click Account Dashboard, located under Pages on the left side menu in Management Interface. This opens Account Dashboard, which displays a listing of menu items available to your customers after they log into their account in WebShop.
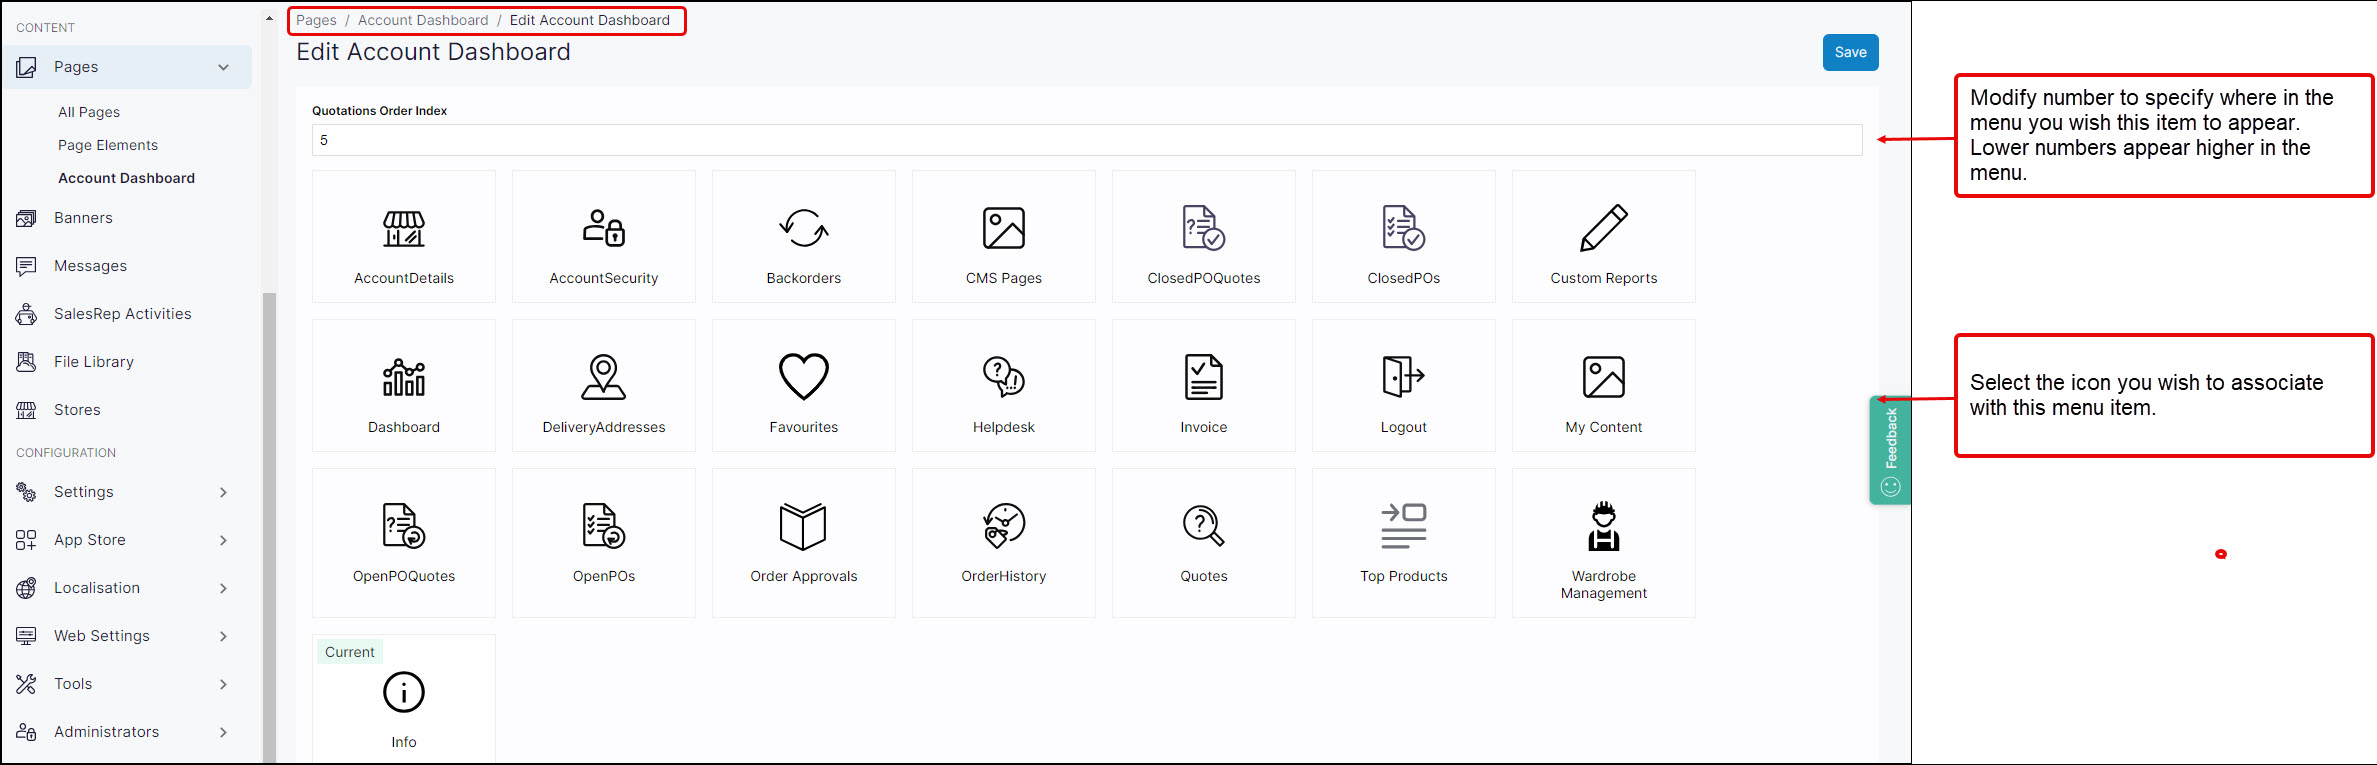
Click the edit icon to the right of the menu item you wish to modify. This opens Edit Account Dashboard, and gives you access to apply an icon and index order number for the opened menu item.
To apply an icon to a menu item,
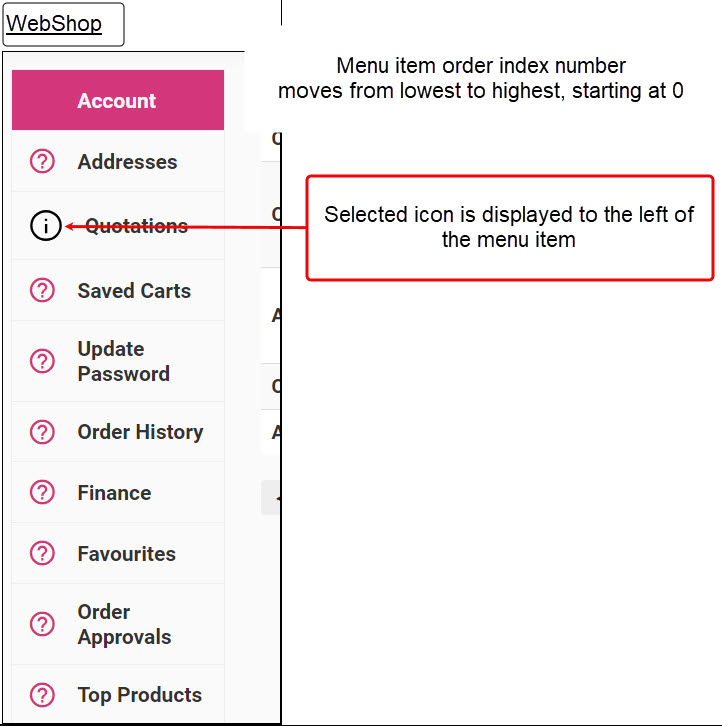
select the icon you wish to associate with the menu item. This icon is displayed to the left of the menu item in “My Account” in WebShop.
Click Save.
To set the index for each menu item,
Update the number under <menu item name> Order Index on the Edit Account Dashboard to reflect where you wish the menu item to appear on the menu in “My Account” in WebShop.
Click Save.
Each menu item has an index order number associated with it. The index order number specifies where in the menu the item appears. The index order number moves from lowest (0) to highest, with lower numbers appearing higher on the list. The order numbers do not need to be sequential.
Remember that saved changes are immediately visible on WebShop.
What does my customer see in WebShop?
Once your customer logs into their WebShop, they are presented with menu options in “My Account”. After updating dashboard icons and indexes, the menu options are displayed as per your updated configuration.