Using Templates Editor
Purpose and scope
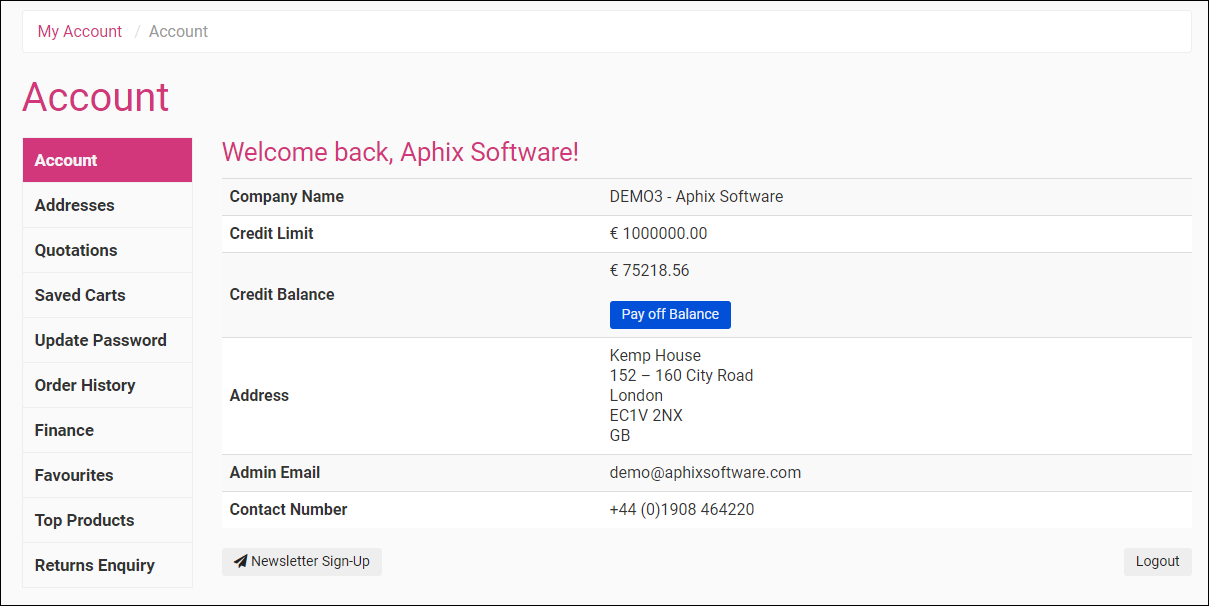
Do you want to add a personalized welcome message to your Account Dashboard in WebShop? Perhaps you want to display only the customer’s name, and not their account number on the Account Dashboard? Or maybe you have a promotional video you wish to share with your customers and you’d like to include this at the bottom of the Account Dashboard screen? Our Templates Editor feature is a code-based design tool to extend the look and feel of your Account Dashboard.
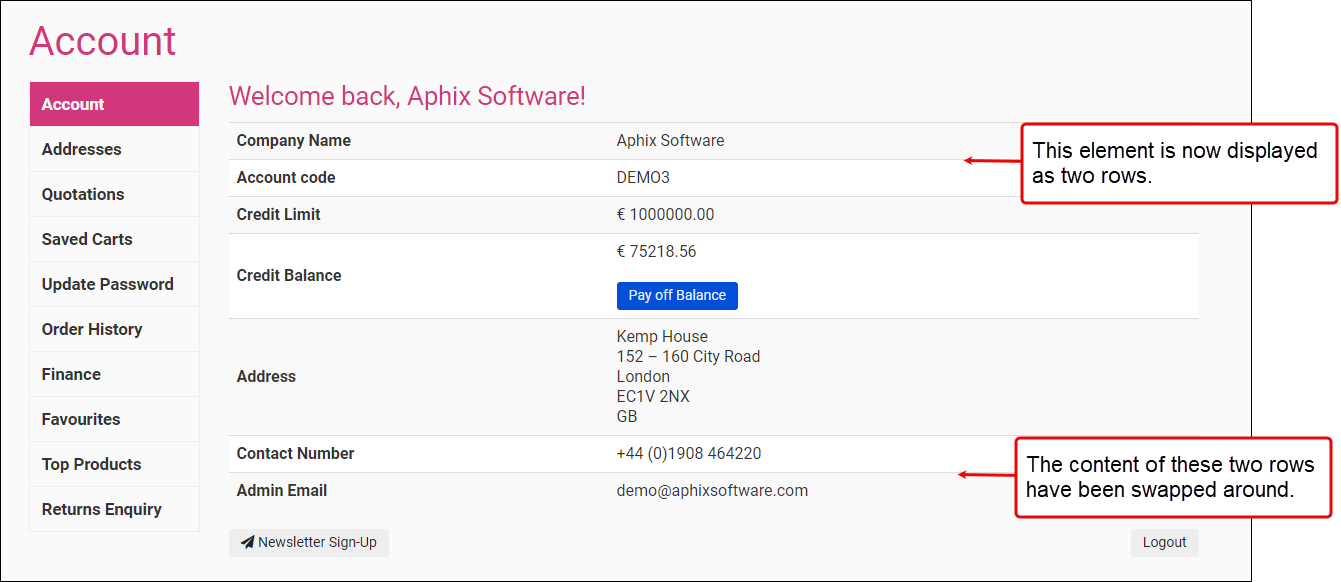
The Templates Editor gives you more control over the look and feel of your WebShop. Initially, we have exposed objects and variables in the Account Dashboard, allowing you to add messages, links to customer promotions and/or move the order of elements contained in the body of the Account Dashboard screen. Use our Using account dashboard icons feature to re-order menu items on the Account Dashboard. We have also introduced a TWIG block to our Visual Page Builder, which allows you to use the Template Editor on content pages also.
This feature is a work in progress. It is enabled upon request. It will be extended to expose more objects and variables over time giving you even more control over the look and feel of your WebShop.
The purpose of this article is to explain what the Templates Editor feature is, and to provide some use cases where you may find it useful.
Key points
Knowledge of coding is required to use this feature. You must understand some basic programming constructs and be comfortable using HTML, CSS and variables.
You are responsible for ensuring that the code you have written doesn’t adversely affect your WebShop. We do not provide free support fix code you have written in the Templates Editor.
This feature is a work in progress.
Currently, it is enabled upon request.
Benefits
Key benefits are:
Tailor messaging to your customers
Highlight and link promotions and offers for your customers directly from their Account Dashboard
Consistency across pages on your WebShop
Any changes you make can be done at a time that suits you.
Any changes that you make are applied immediately, so it is quick and easy to update WebShop as you go along.
Introducing terms and concepts used in this article
Term | Definition |
|---|---|
Hypertext Markup Language | (HTML), the standard markup language for creating Web pages, used to describe the structure of a Web page. |
Twig | an open source template engine which we refer to as our templating language. It consists of a standard syntax that uses expressions, variables and tags to control the content and logic of each template or code snippet. |
Fitting it all together
The Templates Editor is integrated with Management Interface. It is a code-based design tool that can be used to extend the look and feel of your WebShop Account Dashboard. The Template Editor uses Twig. Twig is an open source template engine1, which we refer to as our templating language. Twig consists of a standard syntax that uses expressions, variables and tags to control the content and logic of each template. Read Introduction to Twig - the fast, fast and secure template engine for PHP (external site) for more information about how to use Twig.
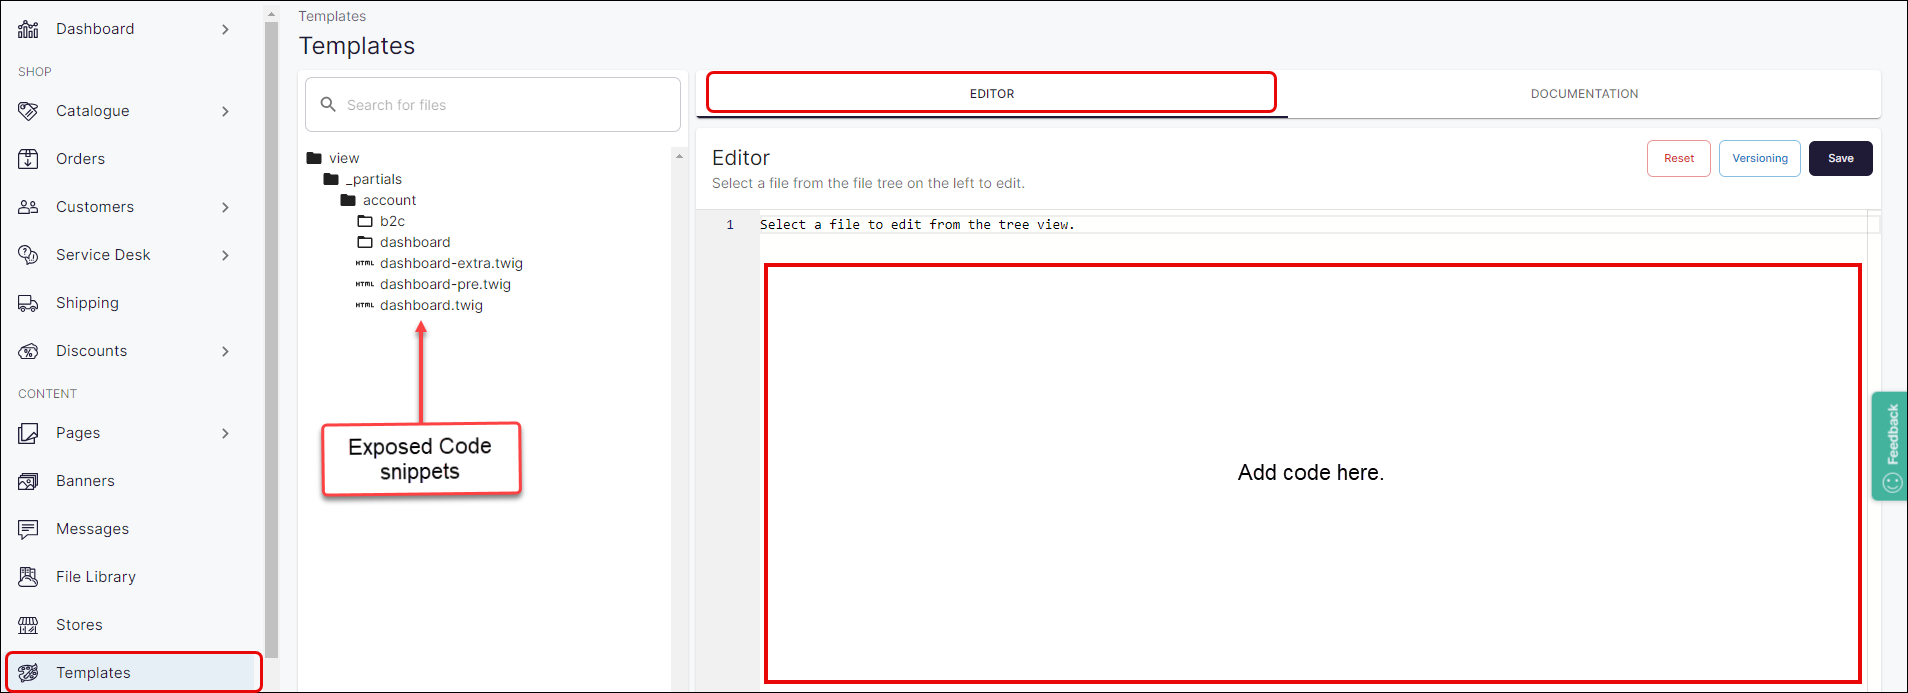
When you open the Templates Editor, the interface is displayed as two panels, a navigational tree and a code editor. The Twig templates that you can modify or add to are listed under the navigational tree. Clicking on the name of the file opens code in the editor to the right of the screen.

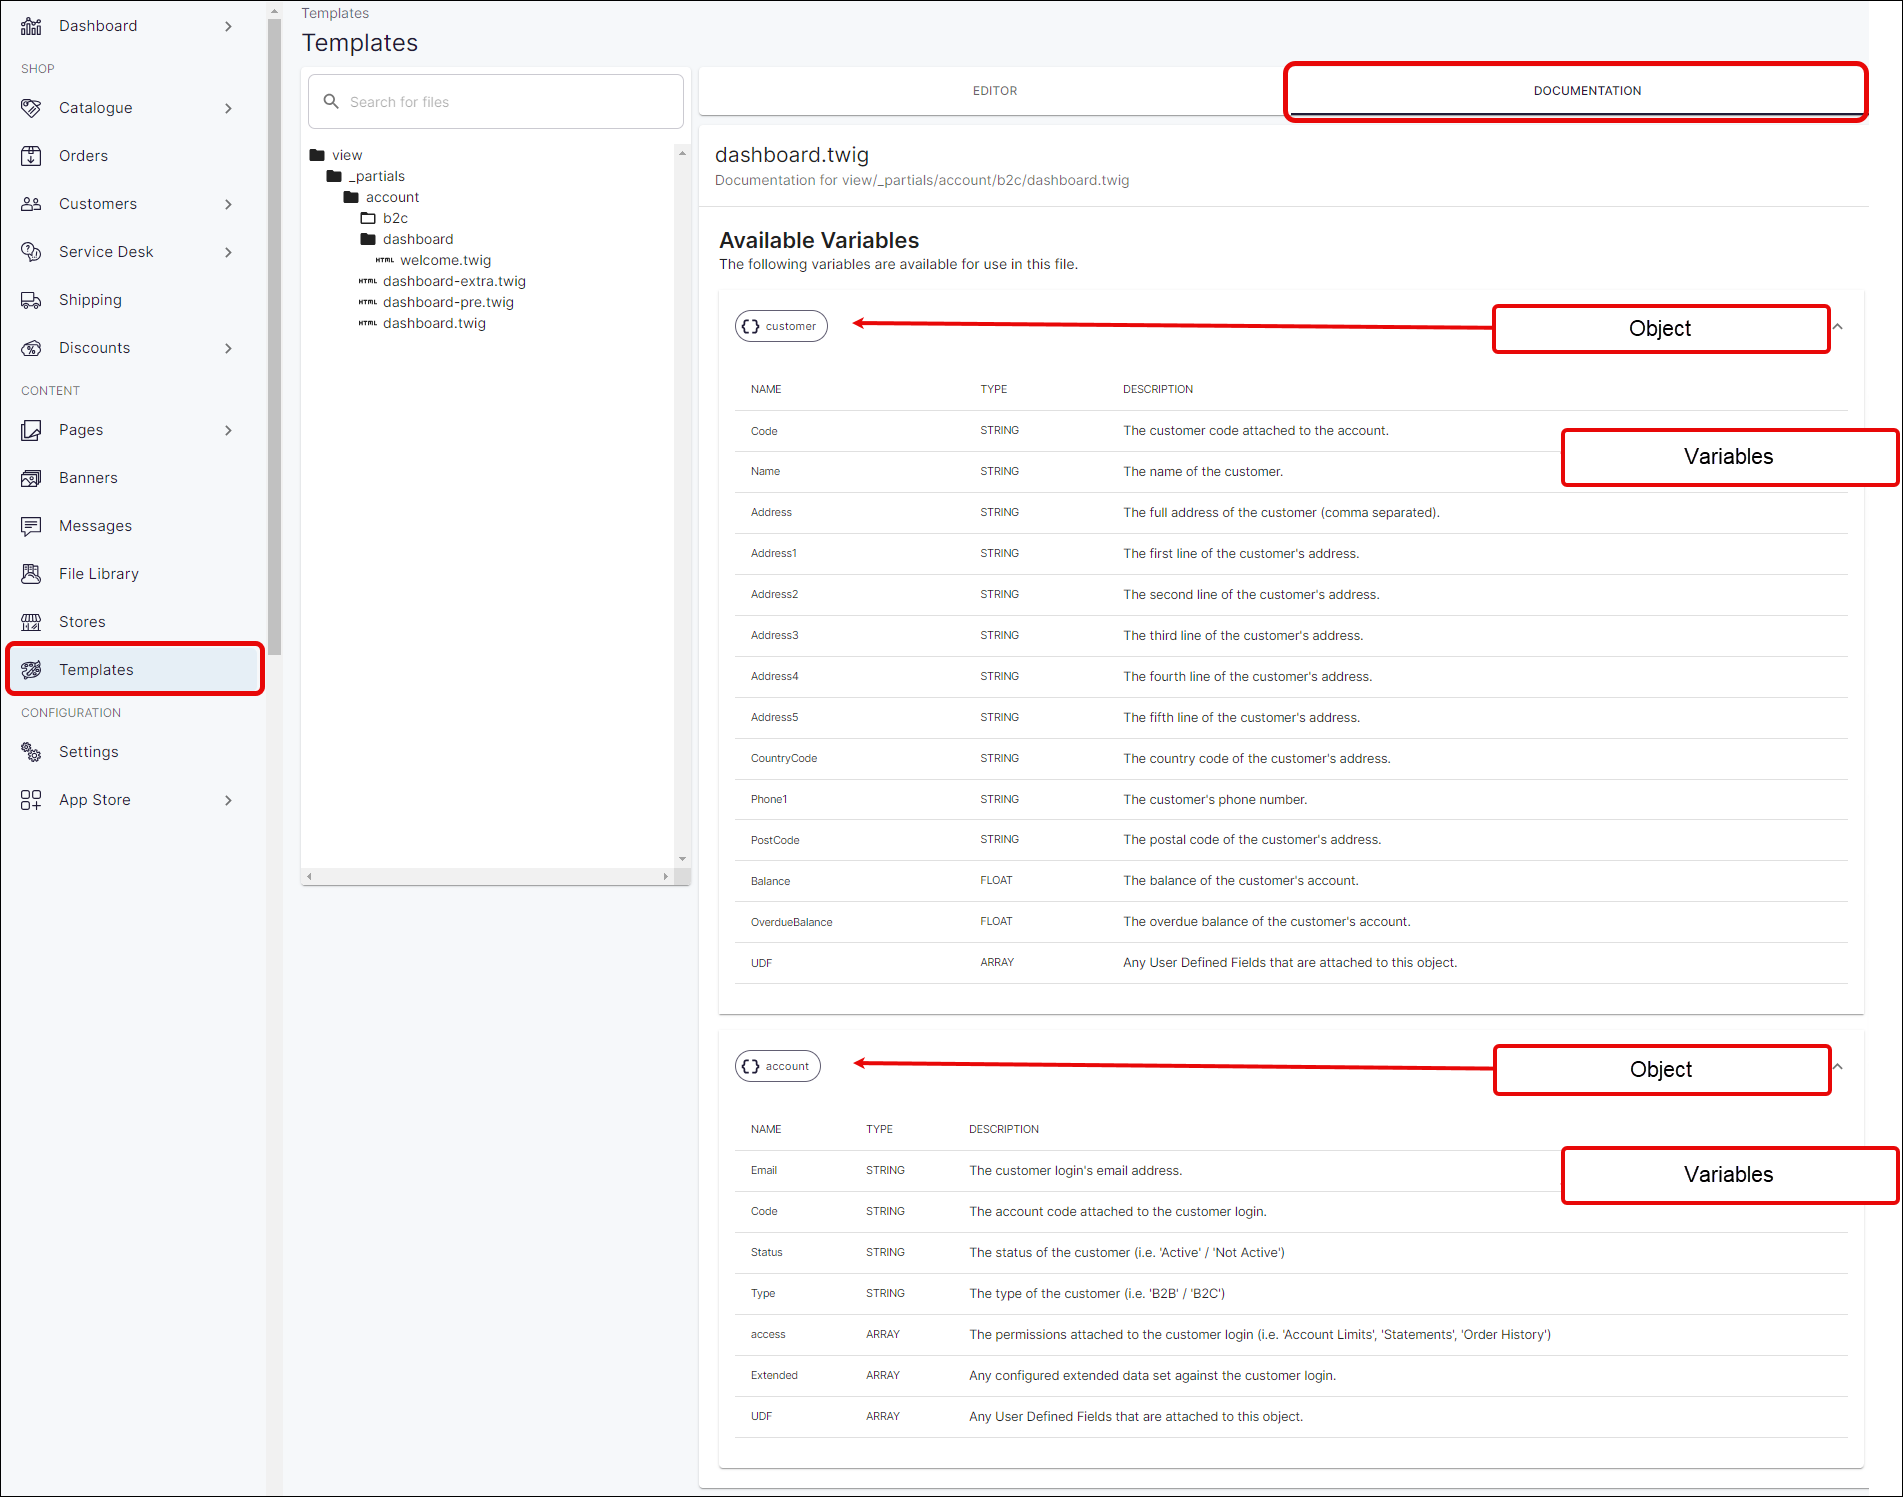
Each template file identifies which part of your Account Dashboard will be updated with your code changes. For example, if you add code to the “dashboard-pre.twig” template, changes are displayed at the top of the main account dashboard page for both B2C and B2B customers. You can change the template’s logic using tags or personalize it using exposed objects and variables. An object groups a set of attributes (variables) associated with that object together. Currently, two objects are available to include in your code:
customer
account
The variables associated with each of these objects are listed under the Documentation tab.
Object and variable names are case sensitive.

More information
Set up
Contact our support team to enable this feature.
Key point
Use this feature at your own risk.
You are responsible for ensuring that the code you have written doesn’t adversely affect your WebShop.
We have included Reset and Versioning functionality to allow you to revert back to the default or previous version of your WebShop. However, we do not support any code changes you make using the Templates editor.
Any fixes that you require from Support are chargeable.
Using the Templates code editor
Open the Templates Editor using the Templates option in Management Interface. This opens the feature which allows you to extend the look and feel of your Account Dashboard.
Select the code snippet you wish to update. Use Twig, our templating language, to add logic and content to the selected template. Once you click Save, your updates are immediately visible in WebShop.
Alternatively, click Reset to reset any code snippet to its default version or click Versioning to either restore a previous version or compare versions of code snippets.
Read our detailed step by step guide to using the Templates Editor.
Use cases
Use case 1: Add a Welcome message to the top of your Account Dashboard
Use case 2: Add a promotion to your Account Dashboard
Use case 3: Move elements of your Account Dashboard page around
Use case 4: Add a YouTube video to the bottom of your Account Dashboard
Use case 5: Add a welcome message to your landing page
Related content
References
1 Introduction to Twig - the fast, fast and secure template engine for PHP


