How do I import and export product options?
Purpose and scope
Do you have products that are variations of each other that you would like to group together on a single screen in WebShop so your customers can quickly find the product variation they wish to purchase? If so, our product options feature is for you! A product option, also referred to as a product variant, is a variation of a particular product which is available for purchase. Each product option has a product code, label and value associated with it. They are displayed together on the product screen, allowing your customers to quickly find the product variation they wish to purchase.
Using product options also affects how your WebShop is indexed by search engines because this feature allows you to group similar products together, which in turn improves your search engine optimization.
This feature guide provides a step by step guide on how to import and export product options using our import / export spreadsheet feature.
Key points
We recommend that you read Understanding product administration in WebShop to understand how the import / export spreadsheet feature operates and Using product options for more information on this feature before following the steps outlined in this guide.
Step by step
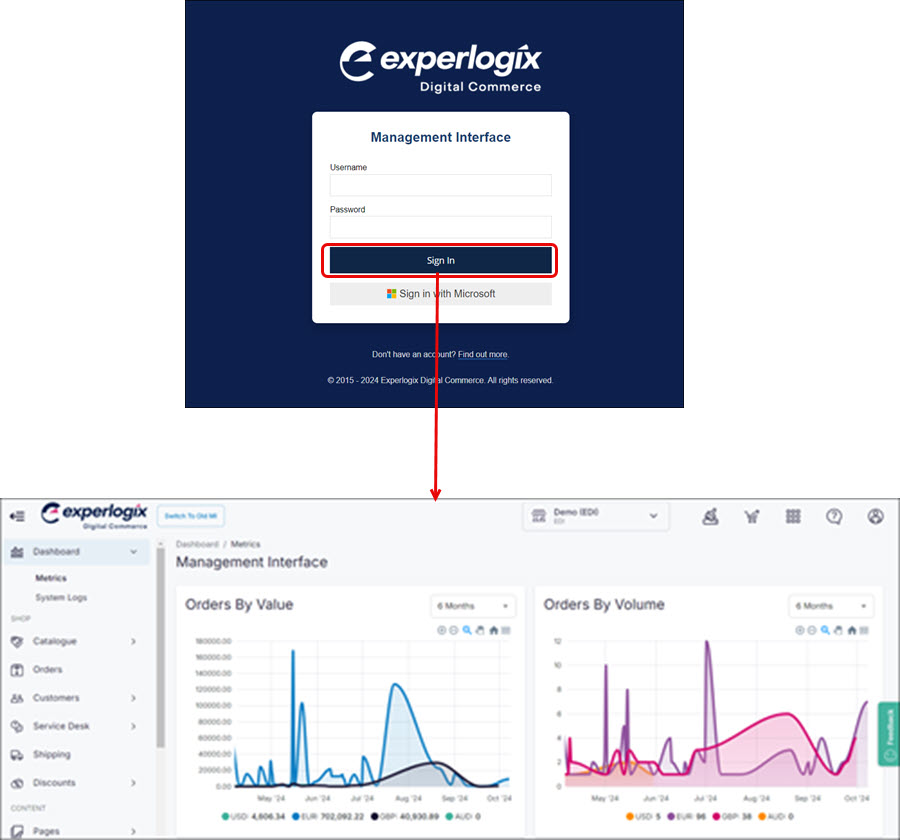
Step 1: Log into Management Interface
Log into Management Interface using your username and password. This opens the dashboard of your Management Interface.
Step 2: Create spreadsheet
Use our product import / export spreadsheet feature to quickly import product specifications.
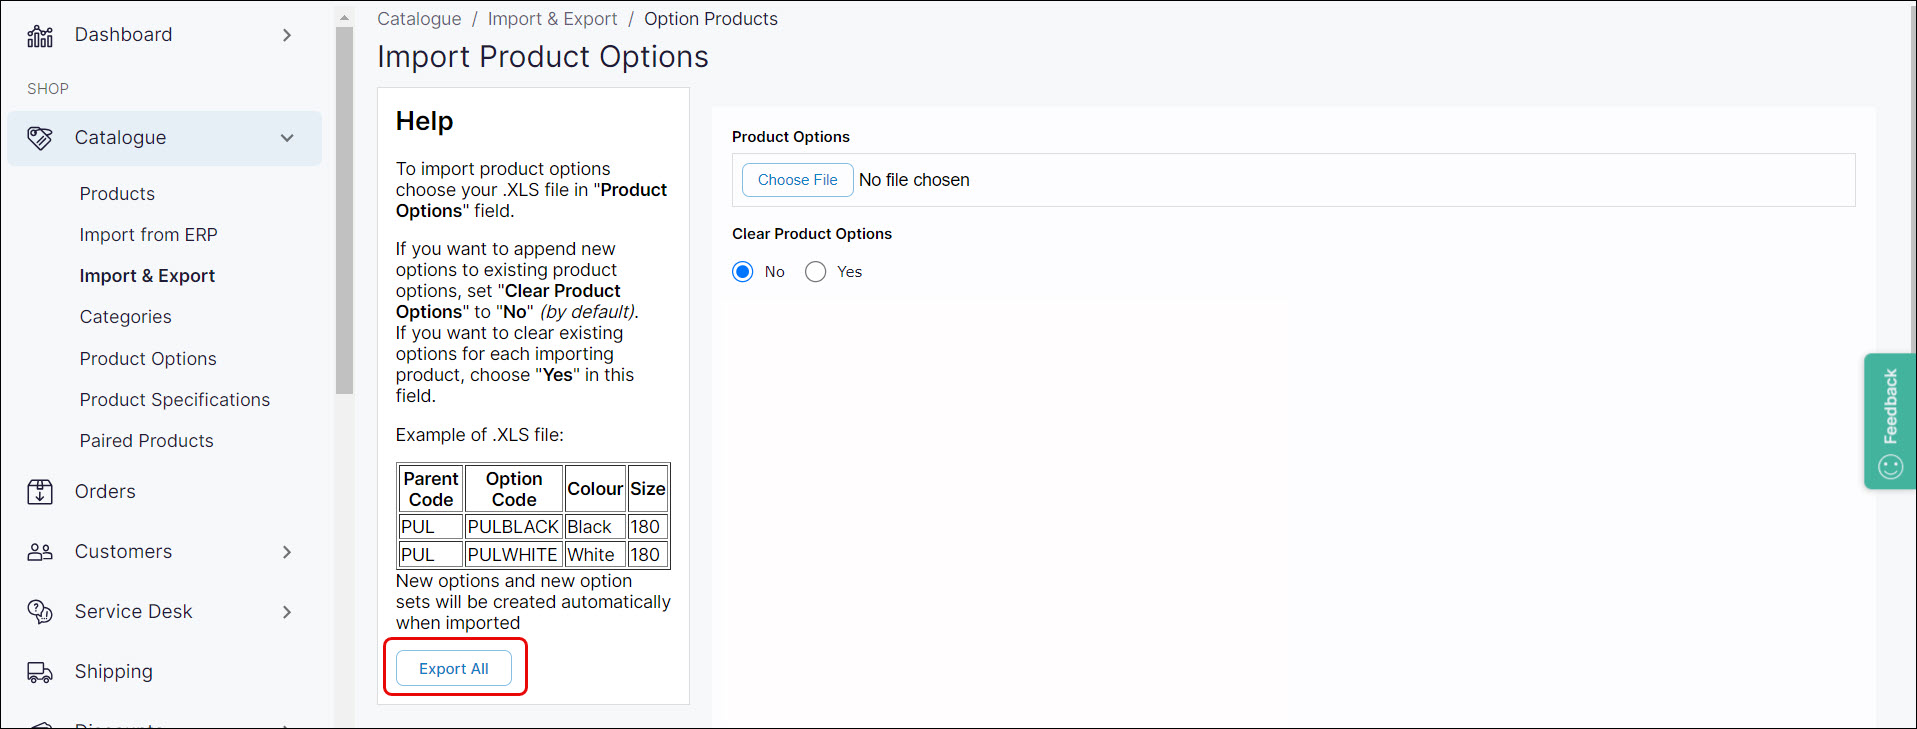
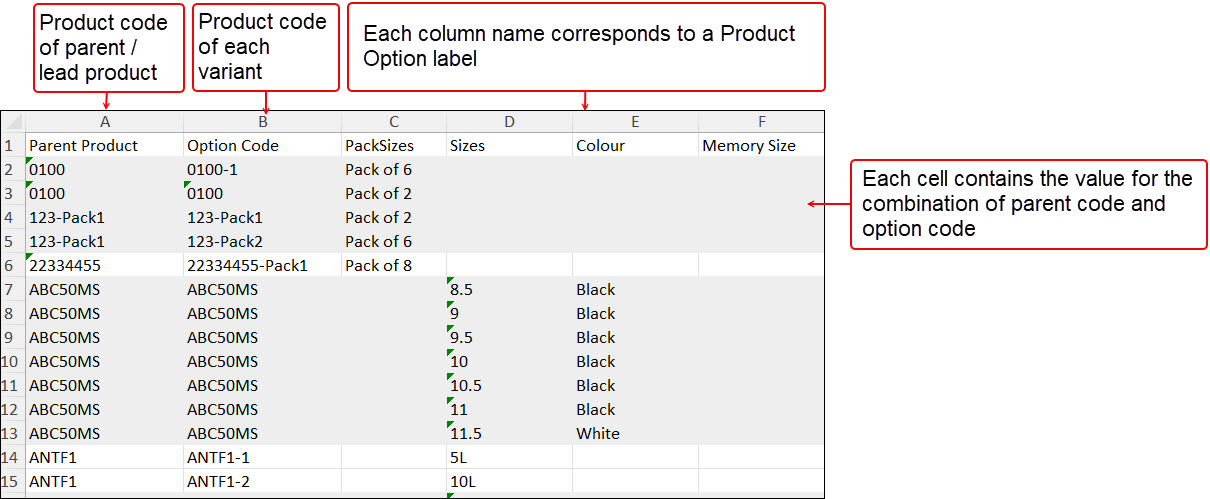
Either manually create a spreadsheet with the information you wish to import. The spreadsheet contains at least three columns as follows:
Parent Product - the product code (SKU) of the parent (or lead) product.
Option Code - the product code (SKU) of a product variant.
[one or more columns with] Option label - the label of the product option; for example, “Colour”
Or export a spreadsheet of existing data and update it as required.
More information There are two ways to export a spreadsheet of existing product options data. Option 1
Option 2
|
Sample spreadsheet
A sample spreadsheet is included.
Key points
Spellings for existing product options must be identical to what is currently saved in WebShop.
To create a new option label, add it to Row 1 in the next available column.
To create a new value for that label, add it to the appropriate cell.
Clear Cache if you do not see your changes immediately.
There are two ways to import product options data.
When the spreadsheet is ready for import, return to the Import & Export screen in Management Interface.
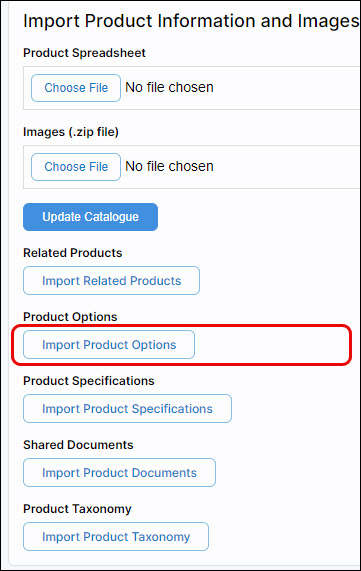
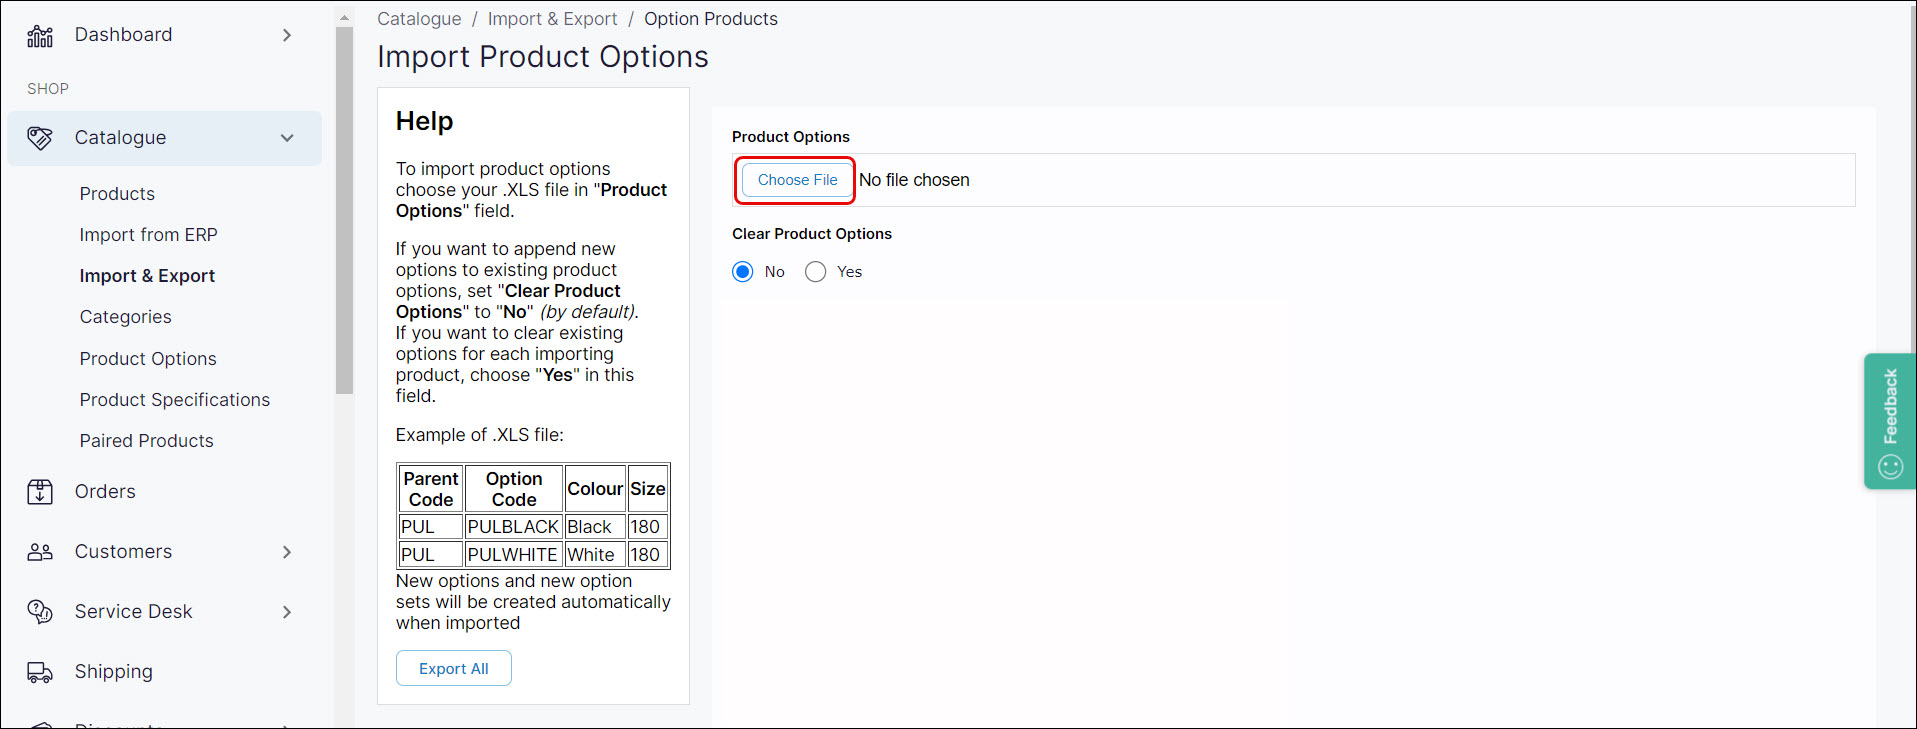
Option 1: Select Import Product Options, found under Product Options in the main content area. This opens the Import Product Options screen. Then, click Choose File and select the spreadsheet from your file directory.
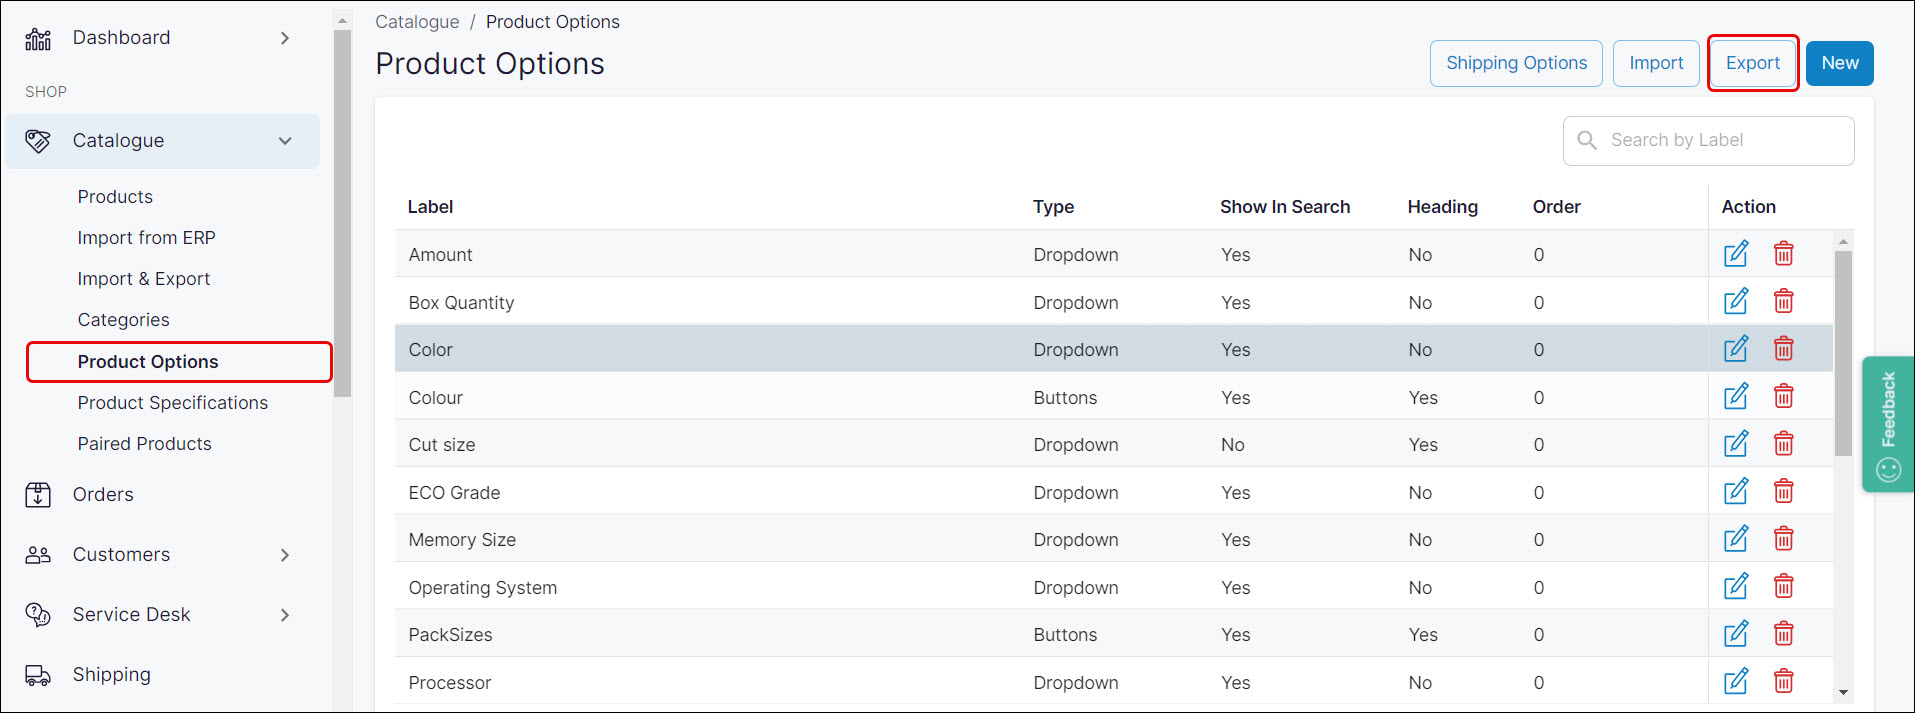
Option 2: Select Product Options. This opens a list of existing product options and their attributes. Then, select Import from the top right of the screen. This slides a tab from the right of the screen. Then, click Select Product Options Spreadsheet and select the spreadsheet from your file directory.
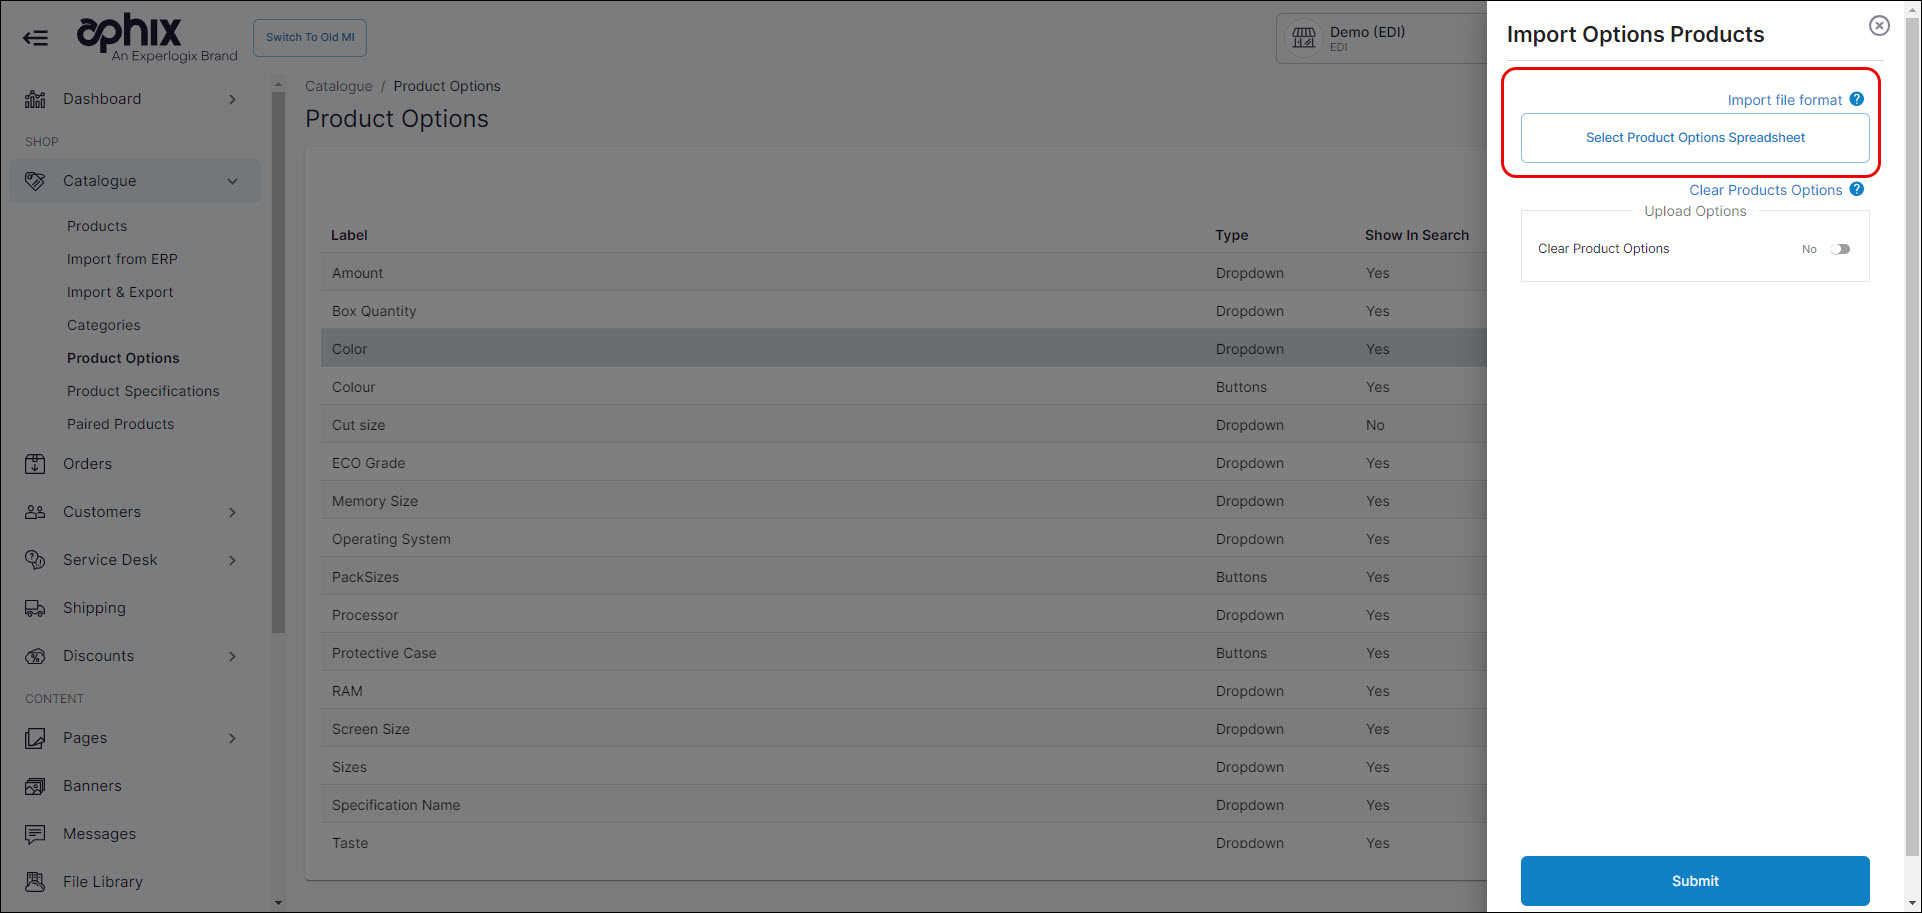
For both options: Select if you wish to clear product options by clicking the “No” or “Yes” radio button, depending on whether you wish to append or replace existing product options.
Option | Select “No” to | Select “Yes” to |
Clear product options | Append new products options to existing product options. (Default) | Replace existing product options with those listed in the updated spreadsheet. |
Click (Option 1) Update Catalogue or (Option 2) Submit. This appends or replaces existing product options with those listed in the updated spreadsheet.
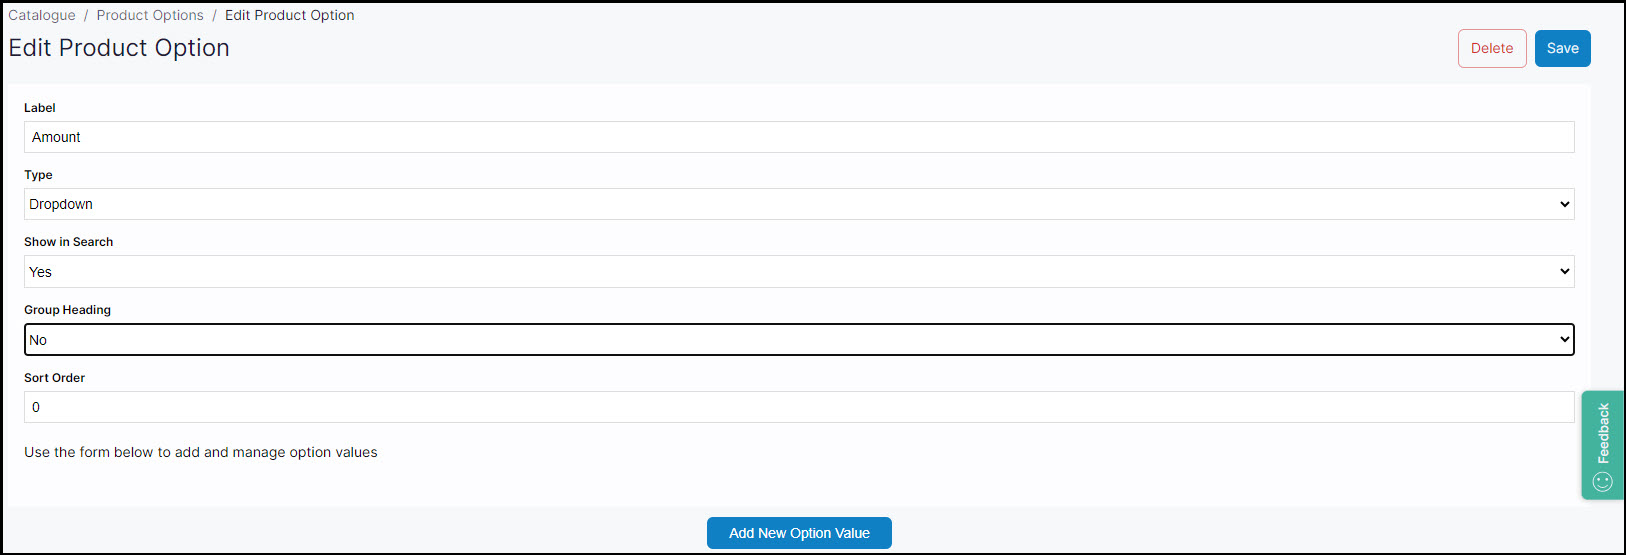
Once product options have been updated, open Product Options and click Edit to the right of the option you wish to modify. Configure how the option looks on the Detailed Product screen by:
adding thumbnail images for each option
specify if you wish to have the option as a drop-down menu or as a button
specify if you wish to include the variant in Search results
specify the order in which the product variant is displayed
Remember that changes are immediately visible in WebShop.
Example continued
To import the spreadsheet created in the previous step, open Product Options, select Import and click Select Product Options Spreadsheet. Select “Aphix-All-ProductOptions-June.xls” from your file directory. Specify if you wish to append or replace product options. Click Submit. This imports your updated product options data.
Verify import
Your customers can see products and their available options on the product listing and detailed product screens in WebShop once you have configured them.
To verify that product options data has been updated correctly, view the product listing page in WebShop. Products which have configured options have View Options underneath the price. Also, if configured, product options are automatically added a filter in the left side menu, as shown.
