How do I configure a single product with product options?
Purpose and scope
Do you have products that are variations of each other that you would like to group together on a single screen in WebShop so your customers can quickly find the product variation they wish to purchase? If so, our product options feature is for you! A product option, also referred to as a product variant, is a variation of a particular product which is available for purchase. Each product option has a product code, label and value associated with it. They are displayed together on the product screen, allowing your customers to quickly find the product variation they wish to purchase.
Using product options also affects how your WebShop is indexed by search engines because this feature allows you to group similar products together, which in turn improves your search engine optimization.
This feature guide provides a step by step guide on how to configure a single product with product options.
We recommend that you read Understanding product administration in WebShop to understand how the import / export spreadsheet feature operates and Using product options for more information on this feature before following the steps outlined in this guide.
Step by step
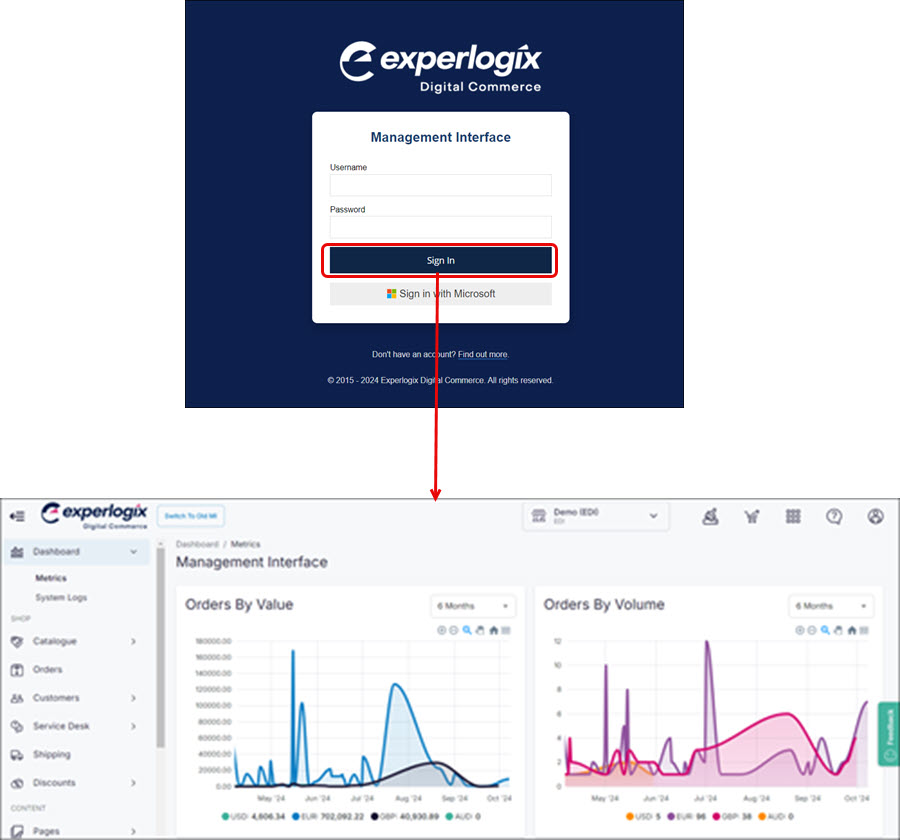
Step 1: Log into Management Interface
Log into Management Interface using your username and password. This opens the dashboard of your Management Interface.
Step 2: Open product administration tool
Click Catalogue on the left hand menu. This opens Product Administration, from where you can manage your product catalogue.

Step 3: Configure product type
Click Products. This opens a listing of products in your catalogue.
Locate the product you wish to configure as an option product.

Click the Edit icon to the right of the product. This opens the product administration tool.
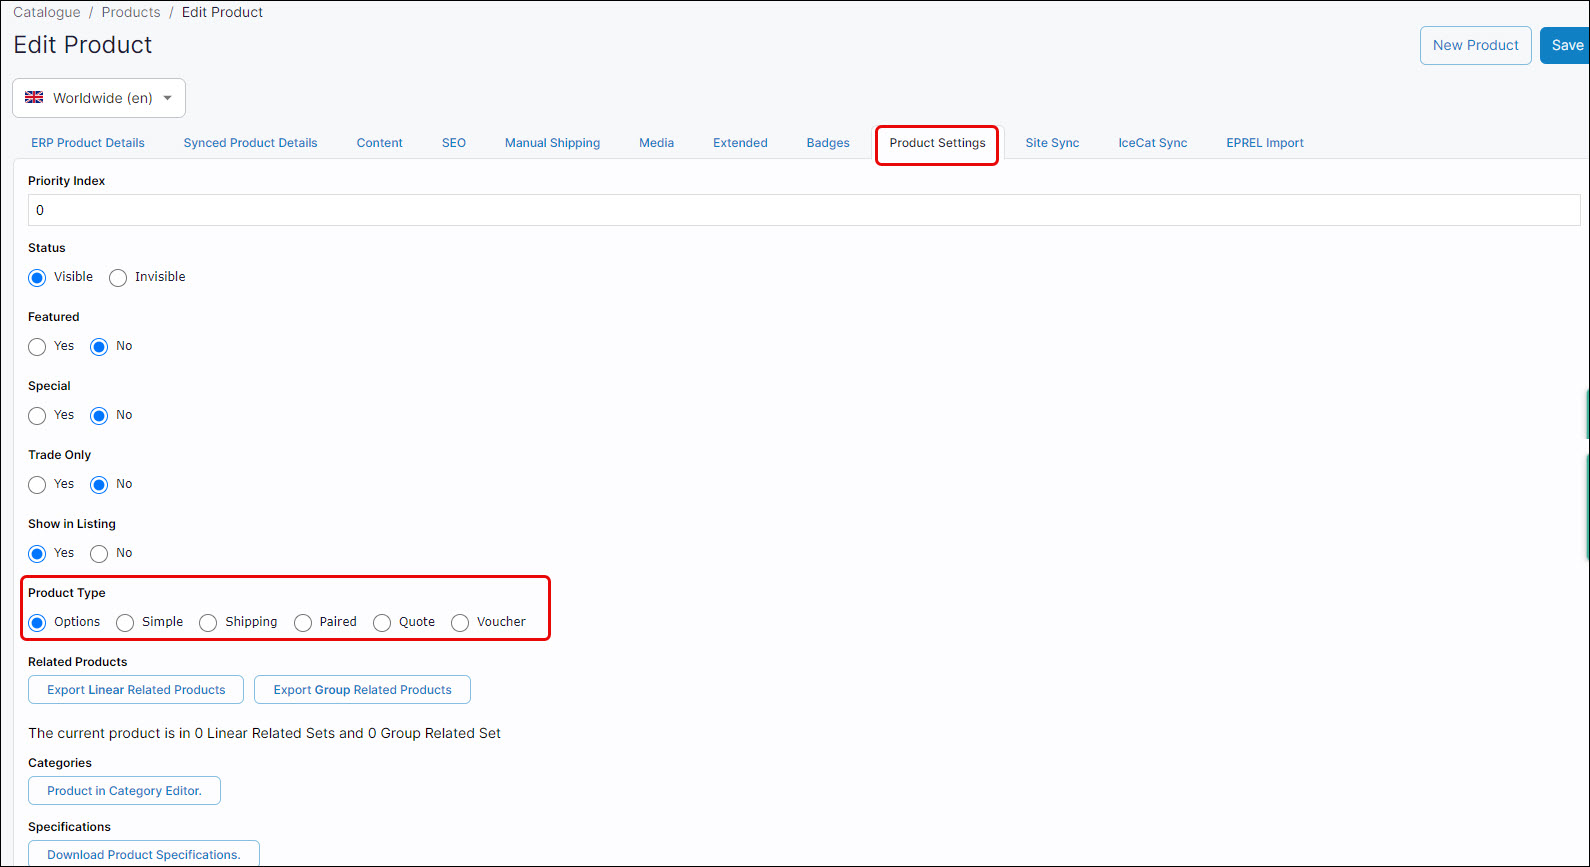
Click Product Settings tab.
Scroll down to the Product Type option, and select Options.
Click Save to save your changes.
Remember that changes are immediately visible in WebShop.
Step 4: Add option labels and values to product
Assumption
You have already created product option labels and values.
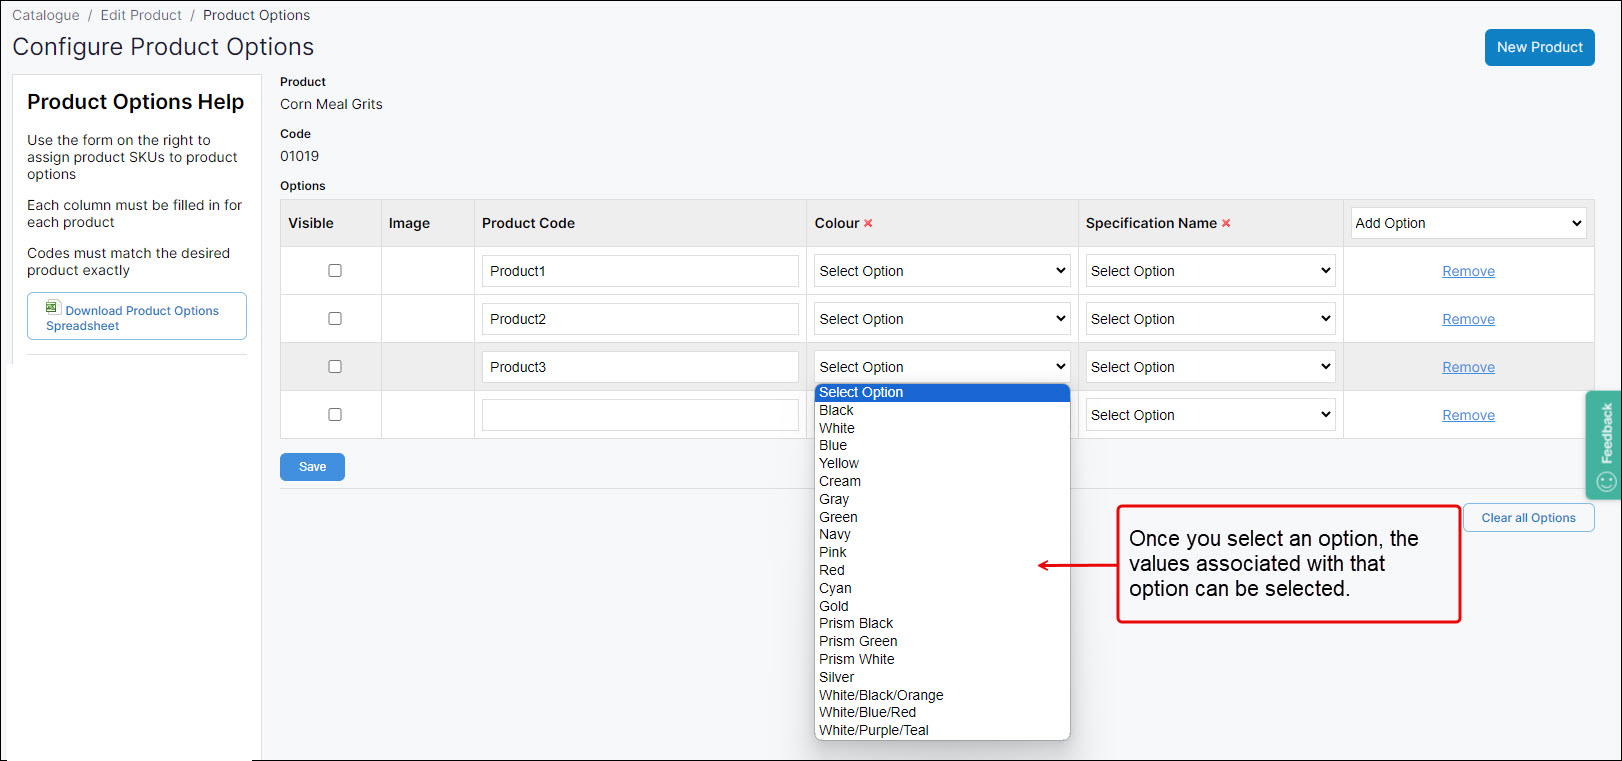
Note that you can see product option labels and values on the Product Options screen. To add a new product option, click New on the Product Options screen and create the product option label. Once you have created the label, you can add one or more values to it.
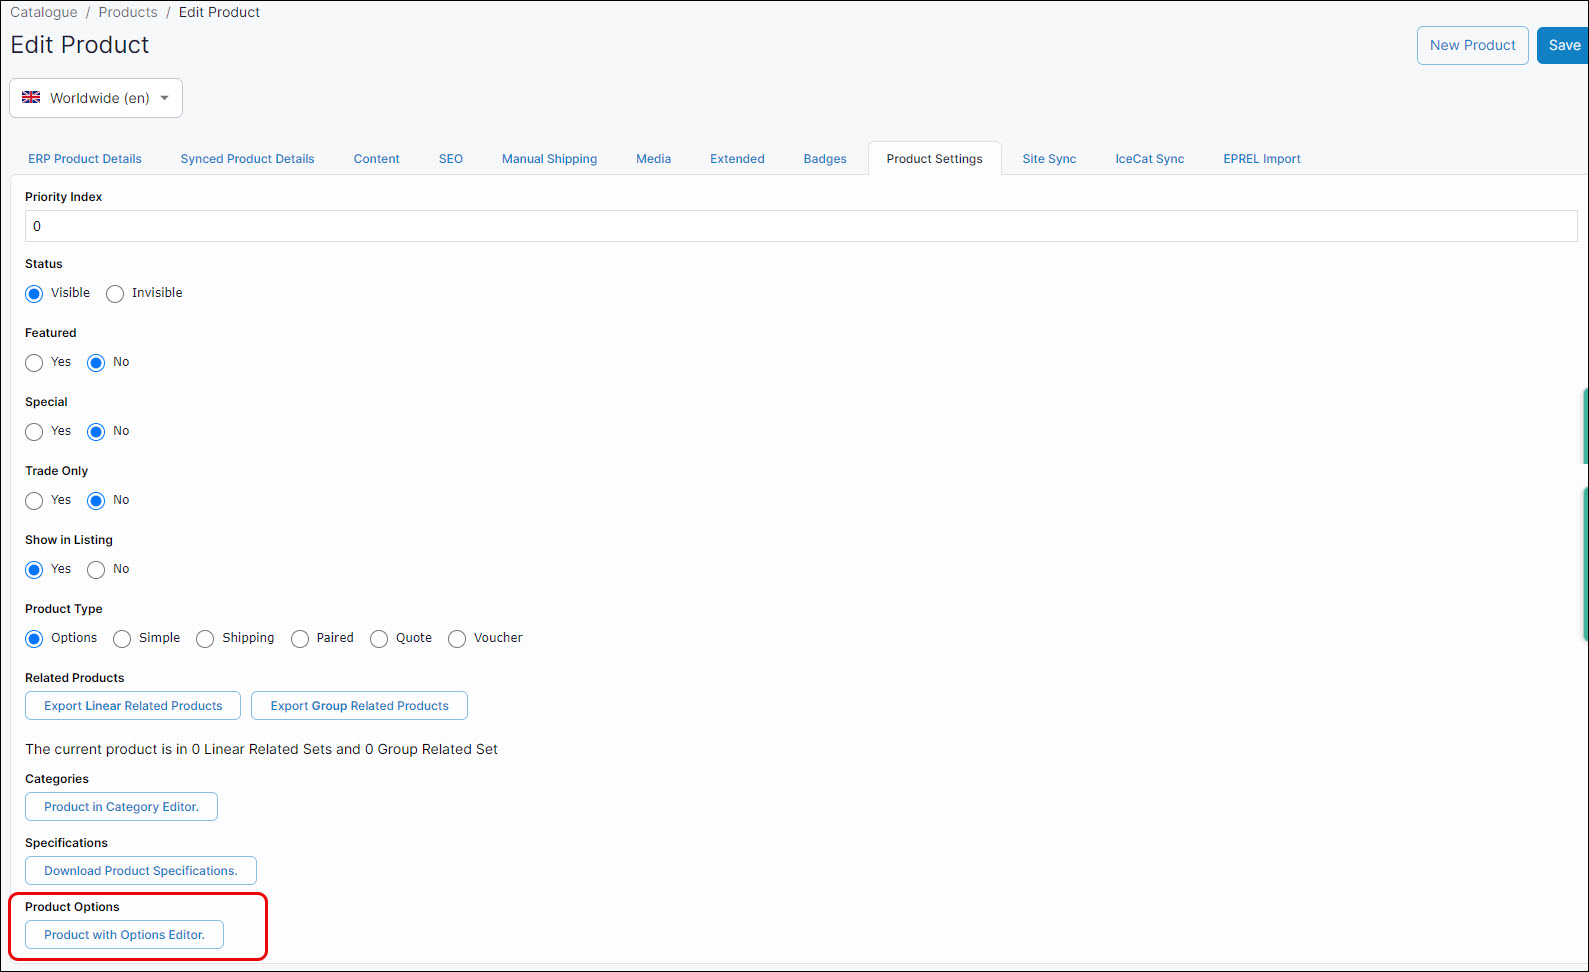
Click Product with Options Editor, found in the Product Settings tab. This opens the Product with Options Editor, which is only visible once a product has been configured and saved as an Options product.
Add product code and product option label you want to assign to it.

Once you select an option, the values associated with are listed as a drop-down box. Select the appropriate value for the product code you have provided. You can add one or more product options.
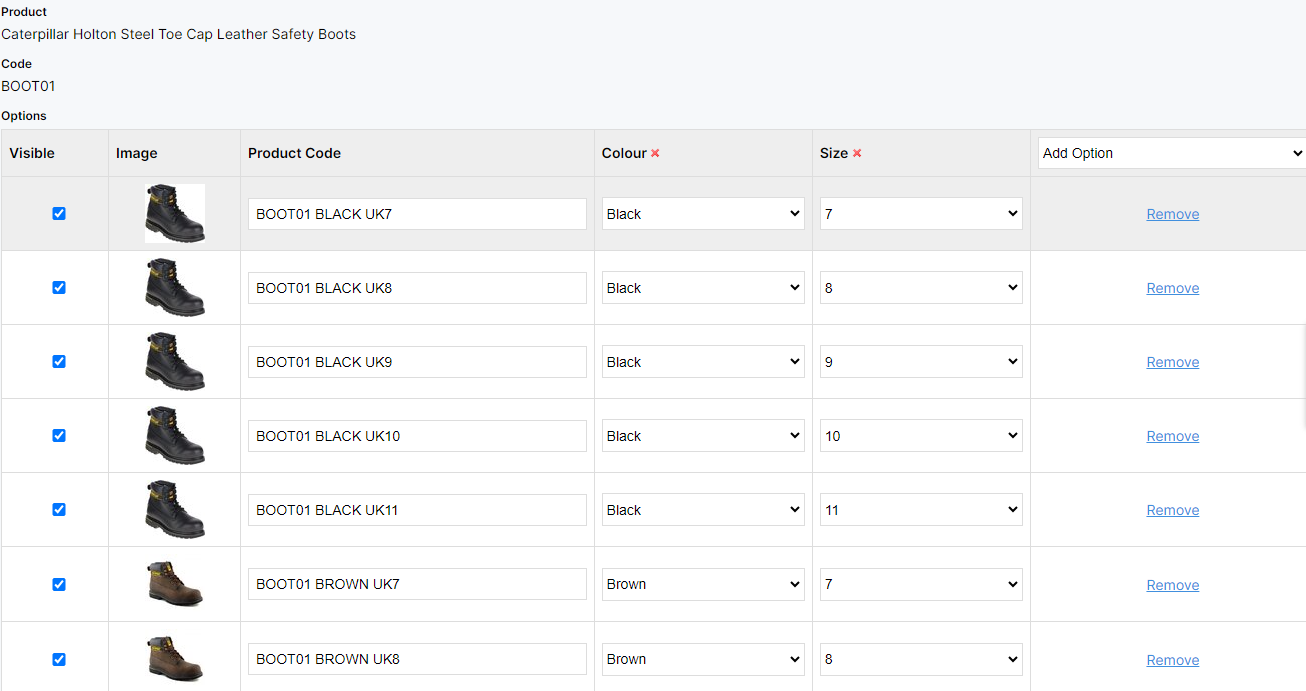
Example
A merchant who sells boots has those boots in a number of different colours and sizes. The merchant sets up the product options as shown:
Click Save to save your changes.
Remember that changes are immediately visible in WebShop.
Verify import
Your customers can see products and their available options on the product listing and detailed product screens in WebShop once you have configured them.
Example
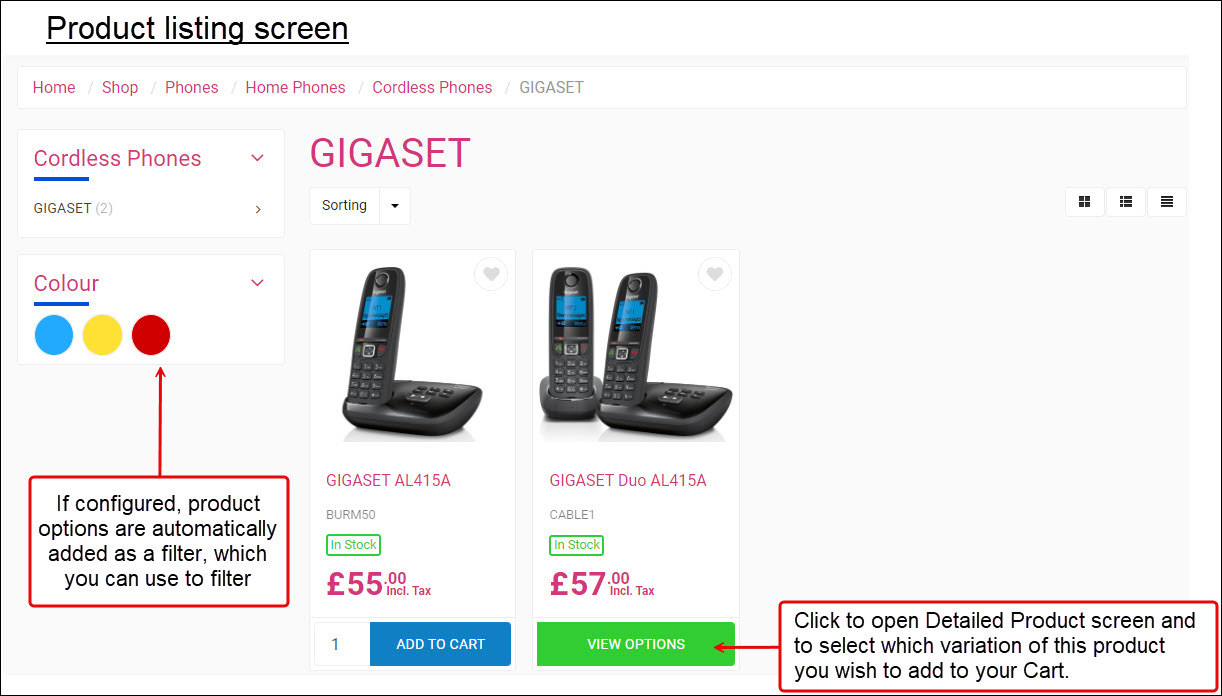
You want to allow your customers to select different colour options for a set of phones that you sell. Currently, it is set up as a Simple product with product code CABLE1 in your catalogue.
In WebShop, before configuring product options, this product’s details are displayed as follows:
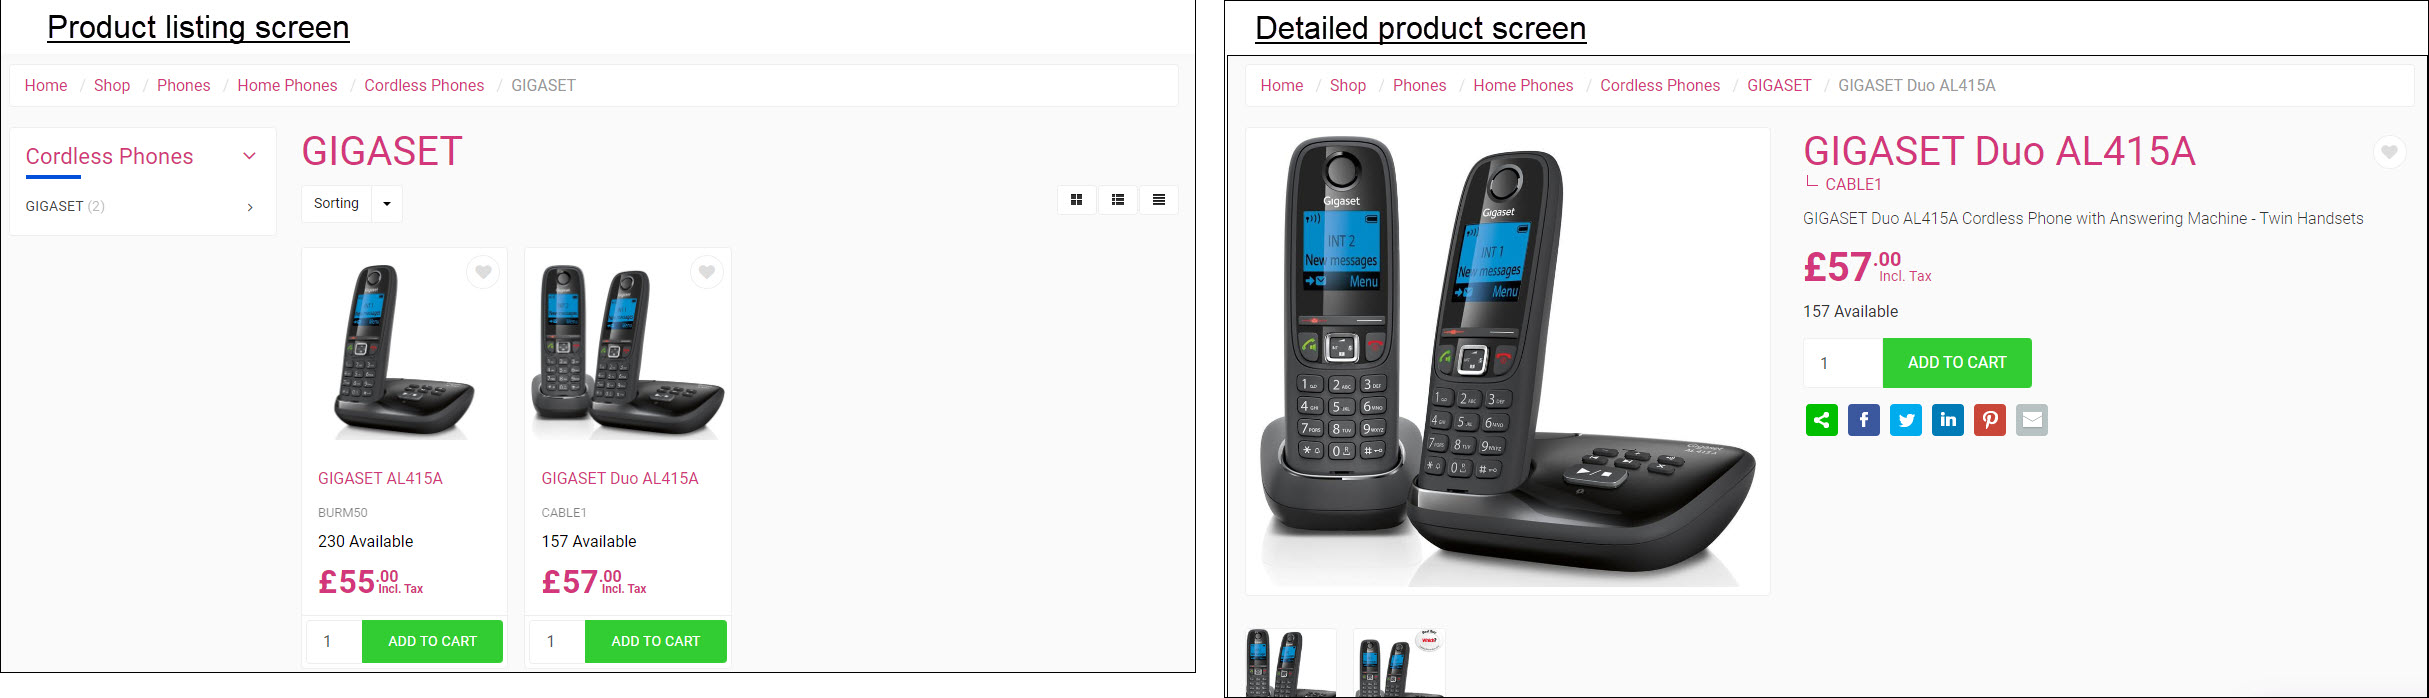
In WebShop, after configuring product options, this product’s details are displayed as follows: